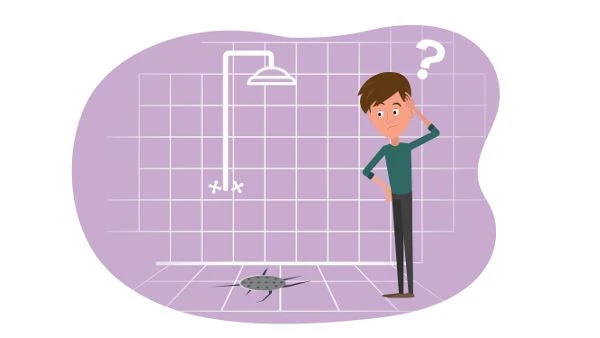
DIY Shower Demo Dangers

It may seem like the easiest part of your DIY bathroom remodel project, but I can tell you from experience that it can be fraught with unpredictable dangers. As such, this job needs to be planned and executed just as carefully as any other part of your remodel project.
The very first thing you need to do is get yourself a good pair of work gloves, safety glasses, ear plugs and a dust mask. When I say dust mask, I mean a respirator with a very fine dust filter attachment. It's a bit of an inconvenience to wear, but it's really the only reliable way to protect your lungs from dangerous dust particles produced during a demo.
Demolition Dust Suppression and Control
Before you take a sledge hammer to that hideous shower tile that you’ve put up with for far too long, take a moment to think about dust control.
Dust Management Plan
You should first determine how you are going to remove the dust from the bathroom you will be working on. I guarantee that if you don’t plan for the dust, it will get away from you and into the rest of your home. A huge mess and a significant health risk.
In my experience, the best way to do this is by depressurizing the bathroom with the existing exhaust fan. When the job is nearing completion, the fan can be replaced with a new one. A simple but effective strategy.
There are also other strategies that you can use if your bathroom does not have an exhaust fan, window or either. See my complete shower demolition post for more details.
Shower Wall Tile Removal
One of the biggest risks you face when removing the tile from the shower wall is accidentally cutting into an electrical wire or water supply pipe behind the old tile.
When cutting into the wall, make sure that you only bury the blade (or grinding wheel) only around 1″ deep into the wall so you can cut through the tile and backer but not penetrate the stud space too much. This will lower the risk of damage.
But an even better way to remove tile is:
The Smashing Technique
It involves using a hammer to CAREFULLY smash through the tile and backer from floor to ceiling and wall to wall in a matrix pattern. Then pull the sections off the wall one by one.
Again, you can see all the details in the tile removal section of my shower demo post.
Bloody Gash, Stitches, and Infection
There is also a huge risk of injury during the tile removal phase of your demo because of the old rusted wall fasteners protruding from the studs after the tile and backer board has been removed from the shower wall.
Remove ALL these fasteners!!! Again, I say from experience that you’ll regret it if you don’t.
Also prepare for tile fragments flying everywhere during this stage. Use your respirator, gloves, eye, and ear protection for sure. Remember, demo can be unpredictable so be a smart DIY’er and don’t take unnecessary risks.
For more on this topic, please check out my Removing Tile from a bathroom Wall post
A Tile Backer Board Bummer

When you’re building a shower, tile backer board is the foundation of the shower wall tile assembly. As such, this installation is critical to the success of your DIY shower remodel project.
The 1st problem that needs to be addressed before installing your backer board is the uneven wall studs that you’ll be attaching them to.
If the first problem is not addressed there will be a second problem…… cracked and broken backer boards and tile lippage.
Shower Wall Framing First
Before you install your backer boards on your shower wall, you should inspect the shower wall framing (wall studs) to ensure that they are straight and plumb.
If some are not plumb, or if they are bowed outward or recessed inward, it would be a good idea to fix this before attaching any wall board or you may be bending and cracking the boards to the point of structural failure.
Broken tile backer boards may not adequately support the tiles you install on their surface and will certainly increase the moisture permeation rate into the stud wall (more on that in the section below).
Most of these backer boards (especially cementitious boards) are not designed to be mounted on an uneven surface. They are designed as a rigid and inflexible substrate for your wall tile.
Even if the board does not fracture, you will not get a firm attachment to the studs if the surface is not an even plane. This means deflection of the board and serious troubles for you down the road.
To fix this you must even out this surface at the very least, but it would also be VERY advantageous if you replaced or reinstalled any studs that are not plumb. You might be surprised at how far out of plumb these studs are (I see it all the time).
Check out my DIY Walk in Shower post for more on this topic
Big Tile Laying Headache
For your shower wall tiling job to work out well, the tile backer board surface must be as flat as possible. If this surface is not flat, there will be tile lippage between adjacent tiles.
What is lippage you ask?
It happens when two adjacent tiles do not meet on the same flat plane – When one tile “rises” above the one beside it, especially at the edges . You’ve seen it many times before, for sure. It’s terribly unattractive and unprofessional looking. (see more detail in the section below)
There is very little you can do to prevent this problem if your backer board is bumpy or undulating more than 1/4″ over two feet. You can lessen the problem somewhat by using a thicker mortar bed but this strategy only helps if the bumps are not too pronounced.
Ok, Hopefully now you know why I am making such a big deal out of making sure the wall framing (and your backer board), are flat and plumb when you are building a shower.
If you’d like to know almost everything about backer board, please read my shower tile backer board post.
Shower Remodel Waterproofing Mistakes

A common DIY shower remodel mistake is to neglect the waterproofing stage altogether.
If you are considering this, let me explain to you why this would be a bad idea.
Needless to say, as a bathroom remodeling contractor, I have been involved in many bathroom and shower demolitions. As such, I have witnessed what happens to showers with no waterproofing membrane at all, and those that were “waterproofed” using old school shower building techniques.
Waterproofing Problems of the Past
Back in the day…. a tiled mortar shower base would have a rubber liner or metal pan or tray underneath it, to prevent water from seeping into the subfloor beneath the shower. At the time, that was the standard for “waterproofing” the shower base.
Old school shower walls had virtually no waterproofing measures behind the tile on inside walls, and only vapour retarder plastic or building felt stapled to the stud face on outside walls.
The assumption was that tile and grout were significant moisture barriers so additional waterproofing measures were not necessary. This assumption caused most showers to fail prematurely because moisture did indeed get through the grout and tile and into the tile backer board and mortar base.
The Undertile Waterproofing Solution
After decades of rot and decay, some very smart people invented a practical way of waterproofing the shower walls and shower base directly under the tile layer. This new strategy significantly improved the success of modern shower remodels.
The problem is that this new strategy is misunderstood, and mistakes are commonly made because or installer ignorance, and a somewhat confusing array of products.
Liquid Membrane Mistakes
The liquid style shower waterproofing membranes can be an effective way of waterproofing your shower walls before tile installation.
However, many people (DIYers and Pros alike) tend to be too hasty during installation which can cause the membrane to be too thin or breached.
See my Shower Waterproofing Membrane post for more info and details on different shower waterproofing membranes.
Shower Pan Pitfalls
If you have read this far, you probably recognize how problematic and complicated the tiled shower base (shower pan) can get. This has caused confusion and a lot of mistakes by professionals and DIY shower remodelers alike.
This is mostly due to the messed up way in which the old waterproofing methods have combined with the new methods.
Although this topic is related to the waterproofing problems section above, shower base problems involve more than just waterproofing, so I thought it deserved a little extra consideration. Read on and I will explain.
The Double Membrane Problem
I can’t tell you how many times I have heard contractors say that it is important to have both a shower pan liner beneath your mortar base, as well as a waterproofing membrane attached to the surface of the mortar base in every shower renovation.
Simply put, this is a terrible idea and it demonstrates a complete misunderstanding of the physics involved in these two systems. You should use one method or the other, but never both. I will explain why….
Drainage Pan/ Mortar Bed – Stone Age Tech
The old school shower pan/mortar method assumes that water will not only be running over the tile surface and into the shower drain, but also through the floor tile assembly, around the edges of mortar base and into the pan that sits on the subfloor, under the mortar base.
From here the water is supposed to run downslope towards weep holes around the base of the floor drain and into the shower drain through these weep holes.
A crude but generally effective system if installed flawlessly (which was very rare in my experience).
Undertile Waterproofing Membrane
The new sheet and liquid membranes are designed to be applied directly on the tile backer board and shower base. This system includes a drain with an integrated membrane bonding flange ensuring the entire system is completely water tight.
Whether you install your own mortar base or simply use a preformed foam shower base, there is no longer any need to install drainage beneath the shower base….. The waterproofing now occurs directly under the tile.
An elegantly simple waterproofing system for any bathroom shower remodel compared with it’s predecessor and frankly, MUCH easier to install correctly.
Combining Two Systems
Even if you enjoy doing pointless work installing drainage pans in addition to undertile membranes, it will do more harm than good when building a shower.
The new under tile membrane system is designed to work with it’s accompanying membrane bonding shower drain. If you are installing an old pan / mortar base system, the drain that you are using is not designed to bond to a sheet membrane like Schluter Kerdi.
This is a problem because there’s no way to properly attach the sheet membrane to the drain flange, creating a breach in the waterproofing around the drain.
This will cause moisture to absorb into the mortar base around the drain. The moisture can then travel via capillary flow throughout the rest of the base, trapping moisture between these two waterproofing layers.
Although no moisture will ever get into the subfloor beneath, the effects of a wet mortar slab between these layers would be unpredictable. At the very minimum it will cause mold growth within the mortar base.
My point is…. the extra work of installing the pan/ mortar base is not only completely pointless, it could cause other serious problems in your bath shower renovation.
Personally, I will always choose to use a sheet waterproofing system…. every time.
New Foam Shower Bases – Problem or Not?
By far the biggest thing that has recently happened in the bath and shower remodel world is the development of extruded polystyrene foam shower bases, seats, and building panels.
I will say that professional installers are jumping onto this bandwagon big time. But as I have eluded to many times, the “thumbs up” from a professional installer does not always mean much in this business.
With that said, I do believe that the foam shower base can be safely installed by professionals as well as DIY shower remodelers….. with some conditions.
Let me explain:
In my business, I will only install foam shower bases and panels that are coated with a cementitious material. The products I use are Hydro-Blok or Wedi.
I have installed the Schluter foam shower base, but I was always uncomfortable with the fact that unmodified thinset mortar would not adhere to the surface of the foam. Recently, they’ve changed their shower pan by attaching a tile bonding layer to the foam surface. This should solve the problem.
But other manufacturers still have not made this modification.
Another problem with the bare foam (uncoated) shower bases is the compression risk.
I’m sure you have all seen the YouTube videos showing compression problems with foam shower bases. Although these installers ignored the recommendation not to install smaller tiles, compression problems will always be a problem with these uncoated foam shower bases..
The cement coated shower bases on the other hand have a very rigid surface that’s very difficult to dent or compress even with a pointed object. The cement surface also bonds extremely well to virtually any tile mortar.
I have installed these bases many times, and I’ve also seen DIY shower remodelers install them with great success.
If you'd like more info on this topic, please check out my post, 7 Common Mistakes to Avoid when you're Waterproofing Shower Walls.
Shower Niche Nausea

You would normally be concerned if there was a big hole in your shower wall, wouldn’t you?
Well that’s exactly what a shower niche is. It’s a big hole that interupts the waterproofing membrane of your shower wall, exposing your home to water infiltration and damage.
That is why it’s so important to ensure that this hole is thoughtfully considered, carefully built, and meticulously waterproofed during your DIY bath shower remodel project.
Hazards of the Custom Built Niche
A custom built shower niche can be a beautiful and useful feature in your shower, but if it’s not constructed properly and the wall framing is not properly shored up, it can be disastrous.
I have seen many shower installations that have experienced grout line cracking and water penetration into the stud wall because the contractor neglected to install a structural header above a custom shower niche.
Although these installations look great when they are new, it could easily take less than 2 years before this shower is unusable due to tile grout and tile cracking causing water damage, mold issues, etc.
Niche Waterproofing Faux Pas
One of the biggest hazards of custom niche installation is inadequate waterproofing. In my experience, this is one of the leading causes of shower leaks in shower remodels that include a custom shower niche.
Water splashes and pools in most shower niches, providing a easy pathway for water to enter the walls through the grout lines & tile and between the tile backer board joints.
That means that the niche interior must be carefully coated or lined with a liquid or sheet waterproofing membrane product during your shower remodel.
Hooray for the Tile Ready Shower Niche!
There are several sizes of good quality tile ready shower niches that can be installed in your shower wall if you are not intent on creating a custom sized shower niche.
These are MUCH safer than the custom built niche because they usually stay between two standard wall studs so they don’t require significant framing modifications.
They are also MUCH safer because they are constructed from either solid plastic or foam panels, which makes them entirely waterproof. That means the inside of these niches do not need to be covered with a waterproofing membrane.
Dangers of The Tile Ready Niche
Although these preformed/ prefab shower niches can reduce your leak worries and save a lot of installation time, they do have their issues.
The plastic tile ready niches require you to use a special tile mastic to glue the tiles to their surface.
The foam niches can easily be punctured or cracked if mishandled, creating a severe leak risk.
Foam niches also need to be properly supported with framing around their entire perimeter to provide adequate structural rigidity.
However, the manufacturers of all the prefab foam niches indicate that they only need to be attached to framing on two opposite sides. Needless to say…. I strongly disagree with this.
If you’d like to find out about how to build a custom shower niche the right way during your shower remodel, you're welcome to check out my How to Build a Shower Niche post.
Shower Niche Shelf Annoyance
One thing I hear regularly from clients is that they regret not installing a more stylish and functional shelf in their shower niche during their shower remodel.
Most people don’t like cleaning their tiled shower niche shelves because gunk tends to get stuck in the corners.
And if you’re lucky enough to have grout lines on your shelf, water tends to pool around the tiles so it’s basically wet all the time.
Aside from the scummy mess, the shelf tiles and grout lines also tend to discolor and mold over time, especially if you haven’t sealed your tiles and grout regularly.
As such, most people prefer a simple modern shelf like glass or slotted stainless steel in their shower niche.
See my Shower niche shelf post for a more in depth discussion of all the shower niche shelf and shower corner shelf options out there.
Finished Shower Niches – A Solution or Another Problem?
Unlike tiled shower niches, finished shower niches are very easy to install and they have an attractive finish right out of the box, so to speak.
As such, they can be a great option if you want to avoid the risk, hassle and expense of a tiled shower niche. And there’s no tiling necessary!
The problem is that all finished shower niches are not created equal.
If you’ve ever done a shower niche search on Google, you may have seen examples of “retrofit niches” . Stainless steel retrofit shower niches are the most common ones you’ll see in these searches.
The problem is that these retrofit style niches are simply inserted into a hole in your shower wall during a full shower remodel. This is an irresponsible install strategy that can lead to leaks in your shower wall because the waterproofing membrane is breached and the niche is only attached with silicon.
But there are also finished niches that bond to the waterproofing membrane. These niches not only maintain the integrity of the membrane, they actually improve it. Because unlike the rest of the shower wall, their surface is entirely impermeable to moisture.
Check out my Shower Niche Problems post to get more details on the topics in this section.
See my Complete Shower Niche Guide if you’d like to know more about shower niches.
Shower Tiling Obstacles

My experiences as a bathroom remodeling contractor have exposed me to A LOT of tiling projects, tiling sub contractors and tiling miseries.
Over the years I’ve learned what not to do when building a shower, how to do it the right way, and why. Here are a few of my secrets.
Shower Base and Walls – Level & Plumb
I know it sounds obvious but please make sure that your shower base or tub is level, and your walls are plumb. If they are more than 1/2″ out, you’re tile installation is destined to look a bit hokey.
If you don’t correct any wonky base or walls, you will have to compensate by cutting the tiles that terminate at the walls and ceiling progressively smaller or larger as you move up the wall.
This not only compromises the look but it also causes a significant amount of extra tile cutting because every new row has a different length.
If you are a stickler, you may even decide to cut each end tile with slight angle cuts if you want to match the corners. A TON of work!
I know that it’s a huge hassle to correct the walls and base but I urge you to seriously consider doing this in the early stages of your shower remodel to make everything is level and plumb if at all possible. It’s worth it!
Ceramic Tile Issues
Tile choice is a pretty big thing that should be considered early in your DIY shower remodel journey.
Although ceramic tiles are used frequently in showers, I would recommend against using them at all in any shower. Here’s why…..
Ceramic is extremely porous and not really a good material to use when your primary goal is to keep the water in the shower and out of your building materials.
A glazed tile only looks like it’s waterproof. The truth is they will still absorb moisture quite readily so try not to use them if at all possible.
The Best Shower Tile – Porcelain
My premium choice for shower wall tile and shower floor tile is porcelain. Different manufacturers all produce porcelain tile products with slightly different water permeabilities, but generally speaking they are waterproof when compared to ceramic tile.
The low moisture absorption of porcelain also means that your mortar will stick much better to these tiles as well, compared to ceramic. This means a positive solid bond, which is good.
If you are interested in more info on this topic, I wrote a entire post on the best tile to use in your shower with all the pros and cons of ceramic and porcelain tile use in your shower remodel.
Tile Lippage
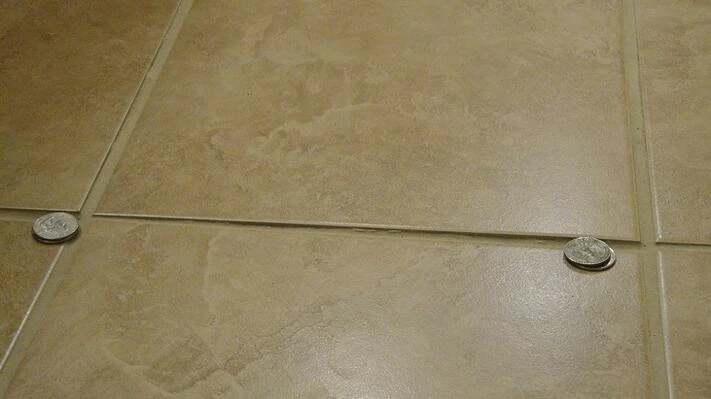
Credit: Ceramic Tile Education Foundation
Lippage happens when adjacent tiles rest on different planes causing the corners or edges not to match. It’s difficult to describe but easy to recognize. See pic above.
Lippage is a fairly common occurrence, sometimes because of irregular or bumpy substrates, but mostly because of inadequate tile setting skills or simply poor workmanship.
It’s a terrible look, so try to plan ahead and use a tile leveling system in your shower remodel.
Level Those Lips
The tile leveling system I usually use is because they are available at Home Depot (or online) and quite inexpensive. I would not recommend buying the cheaper knockoffs available online because they tend to break when you’re inserting the wedge.
You can even buy a pair of special pliers from QEP to help fix the wedges in place. Without pliers it can be a little hard on the fingers if you’re tiling an entire shower.
Another easy way to reduce lippage is to install smaller tiles.
Bumps or undulations in your substrate tend to cause lippage in larger tiles but a smaller tile will tend to follow the undulations in the substrate. This makes the undulations less obvious, and the edges of each tile are much easier to match as well.
This was not (by any means) an exhaustive list of tiling hints. Please check out my Shower Tile Installation post for more hints, tips and tricks to help you in your DIY shower remodel projects.
Frameless Shower Door Problems
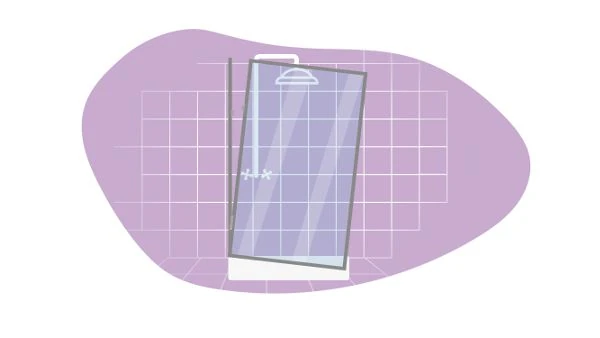
The shower doors that I install the most are the frameless rolling shower doors. These are designed for alcove showers (wall on each side) which are the most popular type. These doors may look a bit intimidating to install, but they are surprisingly straightforward even for a DIY shower remodel.
The rolling shower door usually has a hefty steel rail (or header) at the top, that the door rolls on. This rail is the main structural component of the whole assembly.
Most of these doors are fairly easy to install (if everything is level and plumb), but there can be some big problems you can run into if you don’t start planning the door install early - preferably at the framing stage of your shower remodel.
Shower Door Support
This type of shower door depends on a very strong attachment to the shower wall on both sides of the shower alcove.
The weight of the shower door and the constant movement of this door places an immense amount of stress on this top rail and there will likely be problems if you support it only by attachment to the tile and backer board.
Problems include fracturing of the tile around the mounting holes, grout line cracking, and complete detachment of the rail from the wall.
These doors are designed mostly for aesthetics, not structure, so they have only a tiny mounting plate where the top door rail (shower door header) attaches to the wall.
Because of this, it’s your job to make sure that this small mounting plate gets the most support possible.
The time to address this is at the framing stage of your shower remodel project. Install at least 3/4″ thick support framing between the studs where the shower door rail will be attached to the wall. This ensures that you can screw the rail mounting screws into solid wood backing behind the tile and backer board.
Annoying Shower Door Seals
If you’ve ever had a glass shower door in your walk in shower or your tub shower, you’ve had to deal with the ugly glass shower door seals that ruin your “frameless” shower door look. They also have the problem of getting moldy and disgusting because they’re impossible to clean.
Am I right?
Well if you are planning your shower door purchase and are willing to skirt the rules a bit, I have a solution for you. You may have to follow along for a bit before the solution is obvious, but please bear with me.
I call this my Shower Door Reversal Hack or SDRH.
If you’ve ever installed one of these rolling glass shower doors, you’ve probably also noticed that the door is always on the inside of the shower.
The problem with this arrangement is that whether you have a left or right hand opening, the door gap will always be exposed on the shower head side.
This is why the instructions always required you to attach ugly door sealing strips along both the inside door edge and the inside edge of the fixed panel. These door seals keep the water from shooting out between this gap as soon as you turn on the shower head.
I don’t know why they are designed this way but I do know that it’s not necessary, and there are some distinct advantages if the rolling door is mounted on the outside of the shower enclosure instead.
You’re probably thinking…. How do I do this in my shower renovation?
By using the SDRH of course!
Shower Door Reversal Hack (SDRH)
First, you order your rolling shower door or rolling bathtub door with the opening on the wrong side. Yes, you heard right……. the wrong side.
For example, if you want to enter your shower on the left side, you buy a rolling shower door that has a right side opening instead. This way you can mount the door the wrong way around (180 degrees) and still have your opening on the left.
When you mount the door in this way, the fixed panel will now be on the inside of the shower, closest to the shower head. And the rolling door will be on the outside of the shower, on the opposite side of the shower stall.
This switcheroo will also cause the rail and door rollers to be facing outside of the shower, so you also have to be ok with this look.
That means that when water sprays in the direction of the door, there is no longer a gap for the water to shoot through. This also means that there is no longer a need for an ugly door seal on the edge of the fixed panel or the door. Problem solved!
Take my word for it, if you are interested in buying a rolling shower door for your alcove shower (the door glides along an overhead rail), than this reversal is possible. Try it!
Shower Fixture Plumbing Issues

At some point during your DIY shower remodel project, you’ll have to figure out what fixtures you want to install. This decision should also include some shower plumbing considerations.
You may regret it if you don’t consider some of these key issues before you start building a shower.
Shower Head Height
Shower head placement might seem trivial to you but if you don’t mention to your contractor how high you want your shower head, it could very likely end up too low.
Take my word for it……… I recently hired a new plumber to run the water lines in a shower remodel project I was working on. I came back from lunch only to find that he had mounted the shower 90 (the piece that shower head arm attaches to) at only 70″ from the tub base.
I’m not considered a tall man by any means (68″), but I would very likely hit my head on the shower head in this shower (mounted on a standard shower arm).
I will routinely ask my plumber to mount the shower arm at 78″ or even 80″ if the ceiling height in the bathroom will allow it. I have never received any complaints from clients that their shower head is too high.
Besides…… a 80″ high shower head is always a safer bet even if you aren’t 6′ tall yourself, just in case you eventually decide to sell your home to a tall person.
Hand Shower Placement
Another handy DIY shower remodel hint to consider involves the placement of your hand shower (shower slide bar).
I regularly install hand showers for clients in combination with a standard shower head, so they can have the flexibility of using both while showering.
Sounds quite reasonable, right? ……. I agree, but it’s not really necessary .
Instead, I regularly suggest that the hand shower be appropriately placed so that it can serve both functions. If you place the shower slide bar about 2 1/2″ off center (vertically), the hand shower head ends up in the same center position as a standard shower head installation.
You should also make sure that the slide bar is mounted at a height that would allow the hand shower head to be positioned at a comfortable shower head height when it’s attached at the highest point on the bar (around 76″-78″).
Voila!… This installation gives you the best of both worlds. You can still slide the hand shower attachment down low enough for children to shower, and you also have the luxury to detach the hand shower to wash your dog, rinse the shower, ……… or whatever.
It’s a simple concept that is often overlooked, and my clients seem to appreciate it after its done because the shower looks much less cluttered. I also save them a bit of money for the extra plumbing labor and fixture costs, which they never complain about.
Beware the Steam Shower

I realize that most DIY shower remodels will not be steam shower conversions, but for those that are considering installing a steam shower, you REALLY should heed the following advice.
When your building a shower, I would suggest that you think long and hard about installing a steam shower because it exposes your shower, (and often your whole bathroom) to prolonged high concentrations of water vapor, which can damage the structure around your bathroom.
Steam Shower Waterproofing
This topic could easily have been included in the waterproofing membrane mistakes section above but this info is particularly focused on steam showers. So just consider it Bonus waterproofing Hint.
I’m sure you realize the importance of a waterproofing membrane to protect your new bathroom and shower. What you might not realize is that the super high humidity and water vapor pressure in a steam shower demands that you use a waterproofing membrane that is designed for steam showers and steam rooms.
The current standard for steam showers is a waterproofing membrane with a water vapor permeance rating (or perm rating) of 0.5 or less. But this is a general rating that does not allow much of a safety margin.
Instead, I would strongly recommend that you apply a waterproofing membrane with a perm rating of 0.2 or less, especially if one of the shower walls is an outside wall (EXTREMELY important on this wall).
The product I would recommend is , which has a rating of 0.079 perms. This is considered the lowest perm rating in the business, and this is my go-to membrane for steam showers.
There are also a couple more that are quite good, NobleSeal TS by Noble Company, which has a rating of 0.15 perms, or (NOT the regular Kerdi, only KERDI DS) which has a rating of 0.19 perms.
I have seen a steam shower fail in less than 1 year when a liquid waterproofing membrane was applied (generally much lower perm ratings), so don’t take any chances with your shower remodel project.
Condensation in outside walls
Even a tiny amount of water vapor will tend to condense on any waterproofing surface that is behind your waterproofing membrane in an outside wall.
Consequently, I would remove any existing vapor retarder in the outside walls of your steam shower. The waterproofing membrane I recommended is all you need.
I would instead ensure that the outside bathroom walls are FULLY insulated with spray foam, at least 5 1/2″ deep. You will have to fur-out the wall if the studs are 2×4, but it is very important to maximize insulation depth in this wall.
I use this strategy in all of my steam shower builds.
You can read more about this topic in my waterproofing shower walls post.
Porcelain Shower Tile
I always recommend to homeowners that they install only porcelain tiles on your shower floor and shower walls, because they are far more resistant to moisture than ceramic.
A sealed grout is also very important. I use Stonetech Bulletproof sealer in most of my installations.
I would also recommend that you tile your entire bathroom (including walls and ceiling if possible) and apply a waterproofing membrane to the entire room.
The consequences can be dire if you take shortcuts with your steam shower waterproofing.
If you want more detailed info on steam shower waterproofing, check out my Best Tile for Shower Walls post.
FAQ
Are one day shower remodels worth it?
As a remodel professional I would say that this is the biggest mistake you could make. No renovation with any lasting value can be accomplished in one day. In my experience, these are all bate and switch scams.
How long does it take to remodel a shower?
It totally depends on how extensive the remodel is, the quality you are looking for in your fixtures/ finishes, as well as your labor quality you are expecting. A quality remodel (from framing to finish) of a full shower with an acrylic shower base will take at least 2 weeks.
In what order should I renovate my bathroom?
Start with a full demolition. Start your remodel with sorting out any electrical and plumbing issues (recessed lighting, moving drainage and water lines, etc). Then build the entire shower (except trims), tile the bathroom floor, and install the toilet vanity. Then drywall mudding/ finishing and painting and installation of shower trims, towel bars etc.
Wrap Up
Hopefully you got some helpful advice so you can steer clear of some of the big shower remodel mistakes homeowners and DIYers often make during their bathroom remodel.
Please let me know in the comments section below if you have any specific comments or questions for me, or if you want me to clarify anything. I am always happy to help anyone that’s struggling.
This post is for information purposes only and should NOT be interpreted as professional advice. You should always consult a licensed local contractor before undertaking any remodelling work in your home. Click here for my full Personal / Professional Disclosure.


