Skipping the Waterproof Membrane
 If you plan to install a custom niche into your shower wall, and you want to avoid one of the biggest shower niche problems, you must make sure that you or your contractor doesn’t forget the waterproofing step.
When a custom niche is built well, it can look very sturdy, solid and deceptively waterproof. This is an assumption made far too often when niches are framed into the shower wall.
But no matter how tight the joints may look in a newly constructed niche, they will not keep water from penetrating the bottom and the back of the niche, and running into the stud cavity, if it's not properly waterproofed.
You may be thinking that a leak like this seems unlikely if the niche is properly tiled & grouted after construction, and you would be right… for awhile.
The constant water exposure and regular temperature changes makes the shower environment quite unforgiving. These environmental stresses cause all parts of the tile assembly to move slightly, mostly by expansion and contraction.
Without a waterproofing membrane, this movement almost always causes grout line cracking in your tiled niche. It usually starts out as very fine cracks at the corners that can’t easily be seen.
But even the smallest cracks will allow water to penetrate the bottom of the niche, moving easily through the cement backerboard seams and thinset mortar, to the framing beneath.
The rest you can imagine; moisture in the walls, which leads to mold, dry rot, etc.………. something you can easily avoid.
Applying the correct waterproofing materials (sheet or liquid membrane), will ensure that you won't experience this BIG shower niche problems.
More info on shower waterproofing, check out my: Shower Waterproofing Membrane post.
Installing an Overlap Niche
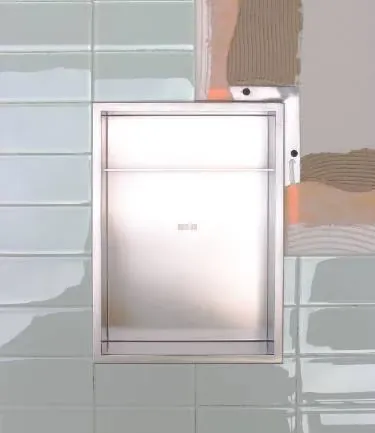
Another one of the BIG shower niche problems is installing a niche that DOES NOT have an integrated waterproofing membrane bonding flange. I call this type of niche an "overlap" niche.
These "Overlap" style shower niches have become particularly popular over the past few years because of the apparent ease of installation. An example would be a finished stainless steel niches like this one:

Typical Overlap Niche
The problem with this type of niche is that it's installed after the wall tile has already been installed and grouted, so it does not integrate with the waterproofing membrane.
During a shower remodel, a hole is cut into the tile backer board for the niche, the wall tile and grout is installed around the niche hole so it can later be inserted into it.
The niche is then inserted into the hole and the niche's overlap flange is simply pressed against the tile with a bead of silicon to complete the installation. This tiny silicon bead is the only defense against water running into the wall cavity.
That's why I consider it one of the big shower niche problems. It's not worth the risk.
Two Correct Ways:

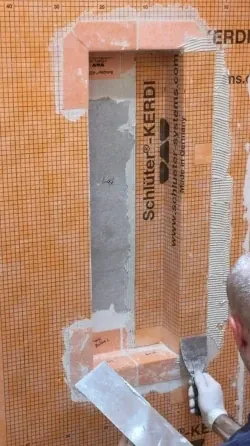
Shluter Kerdi Niche
- The first pic shows a "finished" niche. This unit is made from sheet stainless steel with a brushed finish, so it does not require tiling. The membrane bonding flange mounts on the backerboard surface with screws, and the waterproofing membrane is attached to the top surface of this flange with adhesive (above left image).
- The other pic shows is a tile-ready foam niche that has a 1/2″ thick foam perimeter flange that also serves as a mounting and a waterproofing flange similar to the stainless steel niche. The difference is that the flange must be attached to the framing instead of the backer board surface, so it’s 1/2-inch-thick flange is flush with the 1/2-inch backer board that surrounds it. A strip of sheet waterproofing membrane is then installed over the gap between niche and backer board to connect the niche to the shower wall waterproofing membrane.
See more info on shower waterproofing: Shower Membrane Waterproofing – The Definitive Guide
Installing a Horizontal Shower Niche
 Another BIG one among shower niche problems, is the construction of a custom horizontal tiled niche that compromises the structural integrity of the shower wall.
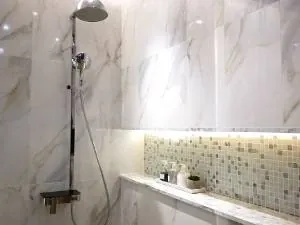
If you’re considering a horizontal shower niche installation in your new remodel project, you've likely seen many examples of these ultra wide horizontal shower niches. These shower niches are the epitome of opulence, sometimes spanning the entire width of the shower, and offering a huge area for storage (see image).
There is a way to install these shower niches correctly and safely, but unfortunately many contractors fail to accomplish this.
Most horizontal shower niches are built into the back shower wall; usually the longest, and most flexible wall in your shower surround. By "flexible", I mean the wall that will deflect the most if someone was to fall against it.
Sometimes this is a bearing wall that the structural integrity of your home depends on, and sometimes it’s not. Either way, cutting a horizontal swath out the structural members of this wall to make room for a niche is a problem.
Most decent contractors will say that applying the correct structural framing around the niche will adequately fortify the structure.
The problem is that these measures mostly address structural stresses applied from above, but do not often address the increased flexibility (reduction in rigidity) caused by cutting out the vertical framing.
The integrity of a tiled assembly requires significant rigidity in this wall to reduce the chance of grout cracking, tile delamination, and failure of the waterproofing membrane.
Many contractors do not even bother installing the minimal structure required for a horizontal niche, which can profoundly compromise the wall’s rigidity and its load bearing capacity.
A Better Horizontal Niche Layout
If your new horizontal niche will span more than a couple of wall studs, the safest way to build it is to construct a new wall adjacent to, where the niche will be installed.
This new wall allows you to build / install your custom niche with only minimal support above the new niche opening because the entire wall is anchored to the stud wall behind it. Super solid, super rigid, and super safe, because the original wall structure remains completely intact.
Another huge benefit of this parallel wall design is that it gives you the green light to install your niche into an exterior wall, because the insulation layer in the your exterior wall will be left undisturbed.
This is the only way that you can insulate properly behind your niche when installing it into an exterior wall - the only way to save the homeowner from the HUGE problems of water condensation behind their niche.
Another great benefit of this strategy is that you won't need to move any utilities that happen to run through the exterior wall.
The only disadvantage of this method would be the slight reduction in your shower floor space, but you can always consider extending the shower into the bathroom by about 4 inches, as long as you have the room.
In my opinion, a typical structural header and jack stud assembly built into the existing wall can still be acceptable if this wall is a non-structural interior wall, but this wall must be built flawlessly by someone qualified. Nothing is safer that the parallel wall design I mentioned above.
Talk to your contractor about it, because it’s extremely important that you avoid this BIG shower niche problem.
If you're interested in a custom vertical shower niche, and you'd like to know how to build it the right way, check out my how to build a shower niche post.
Installing the Niche in an Outside Wall
This is also one of the BIG shower niche problems because water vapor can easily condense behind your niche if you don’t do this install correctly. This is a really big deal.
In general, it’s always the best idea to mount / build your tiled or finished niche in a wall that is not an outside facing wall.
The problem is that the shower environment is a very moist one, and some some water vapor will always make it into the stud cavity through the wall tile, your tile backer board, and also through your tiled niche.
How much water vapor will move into the stud wall is entirely dependent on whether or not a waterproofing membrane has been installed on the shower wall and how well your niche resists water vapor penetration.
The permeability of your niche will vary greatly, depending on the type of shower niche you decide to build / install, and the waterproofing strategy, of course.
Worth the Risk?
With this vapor penetration problem in mind you can probably see why it’s risky to install your tile niche into the exterior wall of your master bath.
In most older homes, the stud cavity is only 3 1/2″ thick and the comfort of your home often depends on this space being filled with insulation.
Even in a relatively mild climate, the colder months can result in a vast difference in temperature from inside to outside. Only a small temperature differential can cause the water vapor in the shower wall to condense on the inside of the wall, even with a good vapor retarder attached.
Even without a shower niche installed in the wall, this can easily occur within a 3 1/2″ stud space in the colder months, especially if there’s no waterproofing membrane on the shower wall.
With a niche taking up most of the space in a 3 1/2″ stud cavity, moisture condensation in the wall cavity is virtually guaranteed if the temperature drops a few degrees outside compared to inside.
Of course, none of this will necessarily occur if the wall and niche are properly waterproofed, and there is enough space behind the niche for adequate insulation.
Needless to say, there is a complex series of factors to consider like stud wall thickness, local climate, choice of waterproofing membrane, niche composition, and the quality and thickness of the wall insulation.
In other words, you should definitely ask a trusted local contractor before you decide to build a niche into an exterior wall to avoid this potential shower niche installation problem.
No Slope at the Bottom of Niche
This is one of the most common shower niche problems in many tiled niches.
Since the framing contractor will not likely slant the bottom of your niche outwards (it's just not what framers do), then it will be up to your tiling contractor to make sure the tile(s) at the bottom of your niche are slanted outwards.
The same goes for prefab niches. The bottom of most of these niches are usually not slanted outwards. It is up to the tiling contractor to do this when installing a prefab. Many Tiling contractors make this mistake because they believe that all prefabricated niches are made this way.
This is a pretty big deal because if water pools at the back of your niche and never dries between showering's, it's just a matter of time before this saturates the entire tile assembly at the bottom of the niche.
Whether water leaks through the back of the niche and into the framing depends on how carefully the waterproofing was applied. To be honest, I am not sure how long it would take for water to leak through the back of a carefully waterproofed niche or a foam prefab niche for that matter.
But what I do know is that water vapor will definitely make it through even the best waterproofing if there is a pool of standing water always present at the back of your niche.
Installing Niche in the Splash Zone
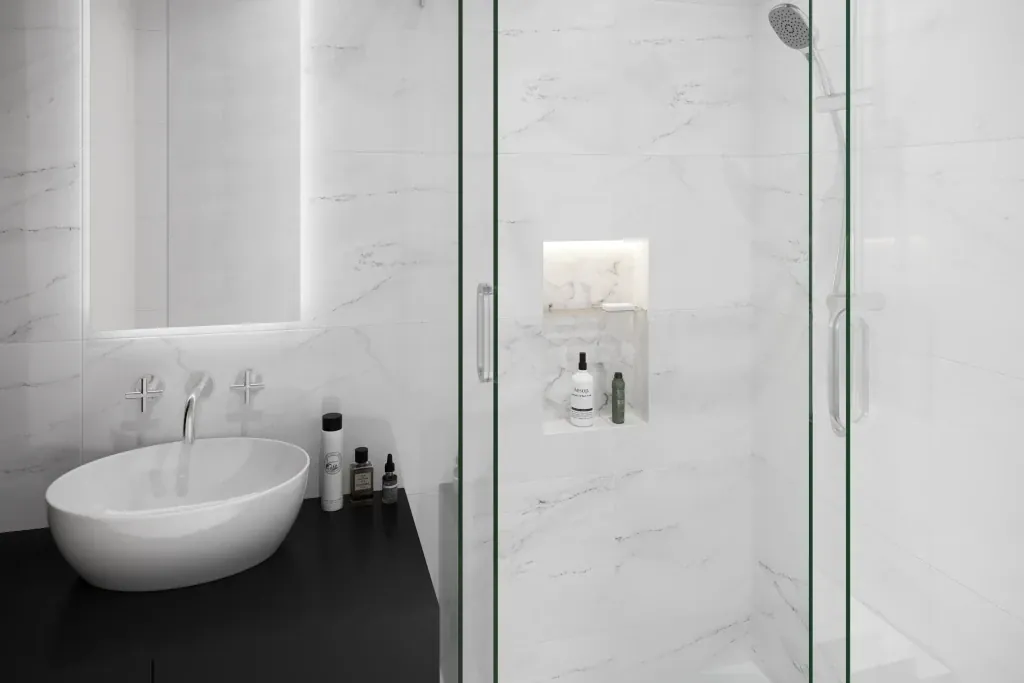 Another one of the BIG shower niche problems is installing your shower niche in what I call the "Splash Zone". This is basically the shower head side of the shower.
The closer to the shower head your niche is installed, the more water will splash into the niche opening, simply because it's where you stand and rinse (see above image).
This is quite annoying for some people because their bar soap gets waterlogged and melts away, but it also makes selecting items more difficult because you must stand in the water stream to select them.
Although this problem seems to be quite intuitive and easy to avoid, I've talked with many homeowners that have neglected to consider this when building their dream shower, only to realize it later when it's too late.
Installing the Wrong Shower Niche Shelf
I consider this to be one of the BIG shower niche problems because as a bathroom remodel contractor, I hear a lot of people express regret about choosing the wrong niche shelf to store their shower products in their tiled niche.
Usually, the cheapest shelf option is a 2 inch thick piece of foam board that you can get for your prefab niche(see below).
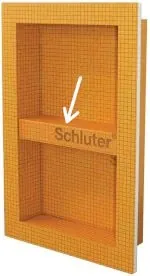 Image courtesy of Schluter Systems
This is often a the most regrettable shelf option because it’s difficult to clean (especially the corners), and the grout lines stain and get moldy.
Another alternative is the glass shelf. A bit more expensive for the material but it’s usually the “go to” shelf alternative for most tiled niches. These shelves are so popular because they’re subtle, modern looking, and considered attractive by most (Ad: The above text lins is an Amazon affiliate link. See affiliate disclosure page for details).
However, after installing glass shelves for many of my clients, they often tell me that it's a bit annoying that the glass always looks so messy and needs so frequent cleaning. And some also say that they hate that their bar soap slips off the shelf so easily.
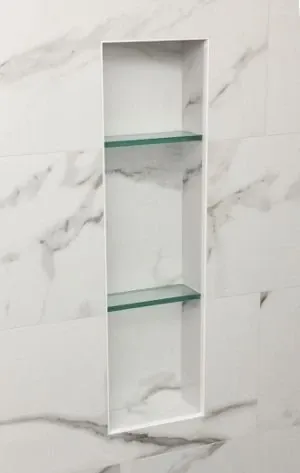 Image courtesy of SKG Renovations
A Better Shower Shelf Option?
The most practical and coolest niche shelf (in my opinion) is the stainless steel niche shelf. In fact I thought it was so great that I decided to design one myself (see image).
I created this shelf to solve all the practical and aesthetic issues my clients complained about over the years. And I think I managed to create not only a practical storage space for your bottles of shampoo, bars of soap, body wash, shaving cream, etc., but also a stylish addition to any shower.
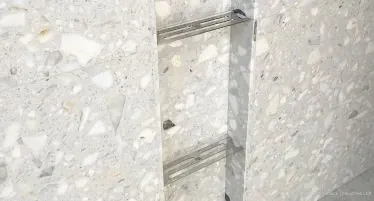 Image courtesy of Redblock Industries
If you’re interested in learning more about shower shelves, please check out my shower niche shelf post.
FAQ
What are common problems associated with shower niches?
Here are the seven common problems associated with shower niches:
- Skipping the Waterproofing
- Installing an Overlap Niche
- Installing a Horizontal Niche
- Installing a Niche in an Outside Wall
- Not Sloping the Bottom of Niche
- Installing Niche in the Splash Zone
- Installing the Wrong Niche Shelf.
How can moisture damage affect a shower niche?
Moisture can damage your tiled shower niche and the wall behind your niche if installed incorrectly. A niche in an exterior wall, without a good waterproofing membrane, allows water vapor to get behind the tile and into the stud cavity, resulting in condensation, structural damage, dry rot, and mold growth.
What are the best materials to use for a shower niche to prevent issues?
Stainless steel is the best material for a shower niche simply because it does not allow water vapor to pass through it. This prevents the typical problems caused by conventional prefab or custom tiled niche installations. These problems include condensation, structural damage, and mold growth in the wall cavity behind the niche. The best stainless steel niches also have perimeter membrane bonding flanges which greatly enhance waterproofing around the niche.
Wrap Up
Installing a shower niche can be a deceptively complicated and risky endeavor, but it is possible to avoid the 7 BIG shower niche install problems.
If you need help with niche placement and design, feel free to check out my Shower Niche Height and Placement post, and 9 Great New Shower Shelf Options posts.
Good luck with your new shower remodel project, AND enjoy your new shower niche!
Please leave a comment below if you’d like to ask any specific questions about niche installation. I'm happy to help!
This post is for information purposes only and should NOT be interpreted as professional advice. You should always consult a licensed local contractor before undertaking any remodeling work in your home. Click here for my full Personal / Professional Disclosure.


