

In this post you’re going to learn my key strategies to deal with the biggest problems / issues that you’ll run into during your DIY shower remodel project.
This wealth of actionable info about shower installation problems (and solutions) comes from my 20 years of bathroom remodelling experience.
Ok, let’s get into it!
Topics Covered:
Please use topic links to skip to the sections you are interested in. But I must warn you…… they are all very interesting and actionable !
Frameless Shower Door Problems
Shower Fixture Plumbing Issues
DIY Shower Demo Dangers

It may seem like the easiest part of your DIY shower remodel project, but I can tell you from experience that it can be fraught with unpredictable dangers. As such, this job needs to be planned and executed just as carefully as any other part of your remodel project.
The very first thing you need to do is get yourself a good pair of work gloves, safety glasses, ear plugs and a dust mask. When I say dust mask, I mean a respirator with a very fine dust filter attachment.
Demolition Dust Suppression and Control
Before you take a sledge hammer to that hideous shower tile that you’ve put up with for far too long, take a moment to think about dust control.
Dust Management Plan
You should first determine how you are going to remove the dust from the bathroom you will be working on. I guarantee that if you don’t plan for the dust, it will get away from you and into the rest of your home. A huge mess and a significant health risk.
In my experience, the best way to do this is by depressurizing the bathroom with the existing exhaust fan. When the job is nearing completion, the fan can be replaced with a new one. A simple but effective strategy.
There are also other strategies that you can use if your bathroom does not have an exhaust fan, window or either. See my complete shower demolition post for more details.
Shower Wall Tile Removal
One of the biggest risks you face when removing the tile from the shower wall is accidentally cutting into an electrical wire or water supply pipe behind the old tile.
When cutting into the wall, make sure that you only bury the blade (or grinding wheel) only around 1″ deep into the wall so you can cut through the tile and backer but not penetrate the stud space too much. This will lower the risk of damage.
But an even better way to remove tile is:
The Smashing Technique
It involves using a hammer to CAREFULLY smash through the tile and backer from floor to ceiling and wall to wall in a matrix pattern. Then pull the sections off the wall one by one.
Again, you can see all the details in the tile removal section of my shower demo post.
Bloody Gash, Stitches, and Infection, OH MY
There is also a huge risk of injury during the tile removal phase of your demo because of the old rusted wall fasteners protruding from the studs after the tile and backer board has been removed from the shower wall.
Remove ALL these fasteners!!! Again, I say from experience that you’ll regret it if you don’t.
Also prepare for tile fragments flying everywhere during this stage. Use your respirator, gloves, eye, and ear protection for sure. Remember, demo can be unpredictable so be a smart DIY’er and don’t take unnecessary risks.
A Tile Backer Board Bummer

When you’re building a shower, tile backer board is the foundation of the shower wall tile assembly. As such, this installation is critical to the success of your DIY shower remodel project.
The 1st problem that needs to be addressed before installing your backer board is the uneven wall studs that you’ll be attaching them to.
If the first problem is not addressed there will be a second problem…… cracked and broken backer boards and tile lippage.
Shower Wall Framing First
Before you install your backer boards on your shower wall, you should inspect the shower wall framing (wall studs) for straightness and plumbness.
If some are not plumb, or if they are bowed outward or recessed inward, it would be a good idea to fix this before attaching any wall board or you may be bending and cracking the boards to the point of structural failure.
Broken tile backer boards may not adequately support the tiles you install on their surface and will certainly increase the moisture permeation rate into the stud wall (more on that in the Shower Waterproofing Mistakes section below).
Most of these backer boards (especially cementitious boards) are not designed to be mounted on an uneven surface. They are designed as a rigid and inflexible substrate for your wall tile.
Even if the board does not fracture, you will not get a firm attachment to the studs if the surface is not an even plane. This means deflection of the board and serious troubles for you down the road.
To fix this you must even out this surface at the very least, but it would also be VERY advantageous if you replaced or reinstalled any studs that are not plumb. You might be surprised at how far out of plumb these studs are (I see it all the time).
Big Tile Laying Headache
For your shower wall tiling job to work out well, the tile backer board surface must be as flat as possible. If this surface is not flat, there will be lippage between adjacent tiles.
What is lippage you ask?
It happens when two adjacent tiles do not meet on the same flat plane – When one tile “rises” above the one beside it, especially at the edges . You’ve seen it many times before, for sure. It’s terribly unattractive and unprofessional looking. (see more detail in the Shower Tiling Obstacles section below)
There is very little you can do to prevent this problem if your backer board is bumpy or undulating more than 1/4″ over two feet. You can lessen the problem somewhat by using a thicker mortar bed but this strategy only helps if the bumps are not too pronounced.
Ok, Hopefully now you know why I am making such a big deal out of making sure the wall framing (and your backer board), are flat and plumb when you are building a shower.
If you’d like to know almost everything about backer board, please read my shower tile backer board post.
Shower Waterproofing Mistakes

A common DIY shower remodel mistake is to neglect the waterproofing stage altogether.
If you are considering this, let me explain to you why this would be a bad idea.
Needless to say, as a bathroom remodelling contractor, I have been involved in many bathroom and shower demolitions. As such, I have witnessed what happens to showers with no waterproofing membrane at all, and those that were “waterproofed” using old school shower building techniques.
Waterproofing Problems of the Past
Back in the day…. a tiled mortar shower base would have a rubber liner or metal pan or tray underneath it, to prevent water from seeping into the subfloor beneath the shower. At the time, that was the standard for “waterproofing” the shower base.
Old school shower walls had virtually no waterproofing measures behind the tile on inside walls, and only vapour retarder plastic or building felt stapled to the stud face on outside walls.
The assumption was that tile and grout were significant moisture barriers so additional waterproofing measures were not necessary. This assumption caused most showers to fail prematurely because moisture did indeed get through the grout and tile and into the tile backer board and mortar base.
The Undertile Waterproofing Solution
After decades of rot and decay, some very smart people invented a practical way of waterproofing the shower walls and shower base directly under the tile layer. This new strategy significantly improved the success of modern shower remodels.
The problem is that this new strategy is misunderstood, and mistakes are commonly made because or installer ignorance, and a somewhat confusing array of products.
Liquid Membrane Mistakes
The liquid style shower waterproofing membranes can be an effective way of waterproofing your shower walls before tile installation.
However, many people (DIYers and Pros alike) tend to be too hasty during installation which can cause the membrane to be too thin or breached.
Prime the Backer board!
In my opinion, the tile backer board and/or shower base should ALWAYS be primed before a liquid membrane is applied.
This simple step drastically reduces the chances of air bubbles forming in the membrane surface.
Without priming, expanding air can come from the backer board to create tiny bubbles in the liquid membrane which are sometimes difficult to detect. These bubbles create hundreds of tiny pinholes or points of very thin membrane, which destroys its waterproofing capability.
See my Shower Waterproofing Membrane post for more info and details.
Shower Pan Pitfalls

If you have read this far, you probably recognize how problematic and complicated the tiled shower base (shower pan) can get. This has caused confusion and a lot of mistakes by professionals and DIY shower remodellers alike.
This is mostly due to the messed up way in which the old waterproofing methods have combined with the new methods.
Although this topic is related to the waterproofing problems section above, shower base problems involve more than just waterproofing, so I thought it deserved a little extra consideration. Read on and I will explain.
The Double Membrane Problem
I can’t tell you how many times I have heard contractors say that it is important to have both a shower pan liner beneath your mortar base, as well as a waterproofing membrane attached to the surface of the mortar base in every shower renovation.
Simply put, this is a terrible idea and it shows a complete misunderstanding of the physics involved in these two systems. You should use one method or the other, but never both. I will explain why….
Drainage Pan/ Mortar Bed – Stone Age Tech
The old school shower pan/mortar method assumes that water will not only be running into the shower drain, but also through the floor tile assembly, around the edges of mortar base and into the pan that sits on the subfloor.
From here the water is supposed to run downslope towards weep holes around the base of the floor drain and into the shower drain through these weep holes.
A crude but generally effective system if installed flawlessly (which was very rare in my experience).
Undertile Waterproofing Membrane
The new sheet and liquid membranes are designed to be applied directly on the tile backer board and shower base. This system includes a drain with an integrated membrane bonding flange ensuring the entire system is completely water tight.
Whether you install your own mortar base or simply use a preformed foam shower base, there is no longer any need to install drainage beneath the shower base….. The waterproofing now occurs directly under the tile.
An elegantly simple waterproofing system compared with it’s predecessor and frankly, MUCH easier to install correctly.
Combining Two Systems
Even if you enjoy doing pointless work installing drainage pans in addition to undertile membranes, it will do more harm than good when building a shower.
The new under tile membrane system is designed to work with it’s accompanying membrane bonding shower drain. If you are installing an old pan / mortar base system, the drain that you are using is not designed to bond to a sheet membrane like Schluter Kerdi.
This is a problem because there’s no way to properly attach the sheet membrane to the drain flange, creating a breach in the waterproofing around the drain.
This will cause moisture to absorb into the mortar base around the drain. The moisture can then travel via capillary flow throughout the rest of the base, trapping moisture between these two waterproofing layers.
Although no moisture will ever get into the subfloor beneath, the effects of a wet mortar slab between these layers would be unpredictable. At the very minimum it will cause mold growth within the mortar base.
My point is…. the extra work of installing the pan/ mortar base is not only completely pointless, it could cause other serious problems in your shower remodel.
Personally, I will always choose to use a sheet waterproofing system…. every time.
New Foam Shower Bases – Problem or Not?
By far the biggest thing that has recently happened in the shower remodel world is the development of extruded polystyrene foam shower bases, seats, and building panels.
I will say that professional installers are jumping onto this bandwagon big time. But as I have eluded to many times, the “thumbs up” from a professional installer does not always mean much in this business.
With that said, I do believe that the foam shower base can be safely installed by professionals as well as DIY shower remodellers….. with some conditions.
Let me explain:
In my business, I will only install foam shower bases and panels that are coated with a cementitious material. The products I use are Hydro-Blok or Wedi.
I have installed the Schluter foam shower base, but I was always uncomfortable with the fact that unmodified thinset mortar would not adhere to the surface of the foam. Recently, they’ve changed their shower pan by attaching a tile bonding layer to the foam surface. This should solve the problem.
But other manufacturers still have not made this modification.
Another problem with the bare foam (uncoated) shower bases is the compression risk.
I’m sure you have all seen the YouTube videos showing compression problems with foam shower bases. Although these installers ignored the recommendation not to install smaller tiles, compression problems will always be a problem with these uncoated foam shower bases..
The cement coated shower bases on the other hand have a very rigid surface that’s very difficult to dent or compress even with a pointed object. The cement surface also bonds extremely well to virtually any tile mortar.
I have installed these bases many times, and I’ve also seen DIY shower remodellers install them with great success.
Shower Niche Nausea
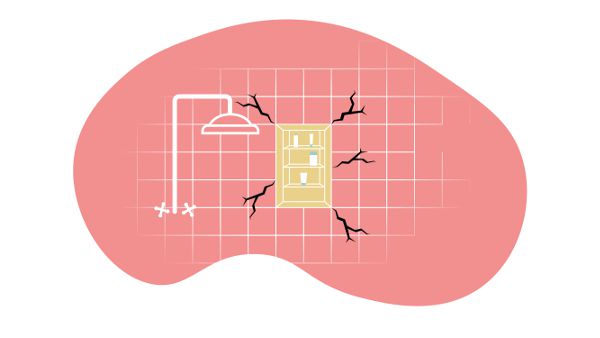
You would normally be concerned if there was a big hole in your shower wall, wouldn’t you?
Well that’s exactly what a shower niche is. It’s a big hole that interupts the waterproofing membrane of your shower wall, exposing your home to water infiltration and damage.
That is why it’s so important to ensure that this hole is thoughtfully considered, carefully built, and meticulously waterproofed during your DIY shower remodel project.
Hazards of the Custom Built Niche
A custom built shower niche can be a beautiful and useful feature in your shower but if it’s not constructed properly and the wall framing is not properly shored up, it can be disastrous.
I have seen many shower installations that have experienced grout line cracking and water penetration into the stud wall because the contractor neglected to install a structural header above a custom shower niche.
Although these installations look great when they are new, it could easily take less than 2 years before this shower is unusable due to tile grout and tile cracking causing water damage, mold issues, etc.
Waterproofing Faux Pas
One of the biggest hazards of custom niche installation is inadequate waterproofing. In my experience, this is one of the leading causes of shower leaks in showers renovations that include a custom shower niche.
Water splashes and pools in most shower niches, providing a easy pathway for water to enter the walls through the grout lines & tile and between the tile backer board joints.
That means that the niche interior must be carefully coated or lined with a liquid or sheet waterproofing membrane product.
Hooray for the Tile Ready Shower Niche!
There are several sizes of good quality tile ready shower niches that can be installed in your shower wall if you are not intent on creating a custom sized shower niche.
These are MUCH safer than the custom built niche because they usually stay between two standard wall studs so they don’t require significant framing modifications.
They are also MUCH safer because they are constructed from either solid plastic or foam panels, which makes them entirely waterproof. That means the inside of these niches do not need to be covered with a waterproofing membrane.
Dangers of The Tile Ready Niche
Although these preformed shower niches can reduce your leak worries and save a lot of installation time, they do have their issues.
The plastic tile ready niches require you to use a special tile mastic to glue the tiles to their surface.
The foam niches can easily be punctured or cracked if mishandled, creating a severe leak risk.
Foam niches also need to be properly supported with framing around their entire perimeter to provide adequate structural rigidity.
However, the manufacturers of all the prefab foam niches indicate that they only need to be attached to framing on two opposite sides. Needless to say…. I strongly disagree with this.
If you’d like to find out about how to build your own custom shower niche the right way, you are welcome to visit my How to Build a Shower Niche post.
Shower Niche Shelf Annoyance
One thing I hear regularly from folks is that they regret not installing a more stylish and functional shelf in their shower niche when they remodelled their shower.
Most people don’t like cleaning their tiled shower niche shelves because gunk tends to get stuck in the corners.
And if you’re lucky enough to have grout lines on your shelf, water tends to pool around the tiles so it’s basically wet all the time.
Aside from the scummy mess, the shelf tiles and grout lines also tend to discolor and mold over time, especially if you haven’t sealed your tiles and grout regularly.
As such, most people prefer a simple modern shelf like glass or slotted stainless steel in their shower niche.
See my Shower niche shelf post for a more in depth discussion of all the shower niche shelf and shower corner shelf options out there.
Finished Shower Niches – A Solution or Another Problem?
Unlike tiled shower niches, finished shower niches are very easy to install and they have an attractive finish right out of the box, so to speak.
As such, they can be a great option if you want to avoid the risk, hassle and expense of a tiled shower niche. And there’s no tiling necessary!
The problem is that all finished shower niches are not created equal.
If you’ve ever done a shower niche search on Google, you may have seen examples of “retrofit niches” . Stainless steel retrofit shower niches are the most common ones you’ll see in these searches.
The problem is that these retrofit style niches are simply inserted into a hole in your shower wall during a full remodel. This is an irresponsible install strategy that can lead to leaks in your shower wall because the waterproofing membrane is breached and the niche is only attached with silicon.
But there are also finished niches that bond to the waterproofing membrane. These niches not only maintain the integrity of the membrane, they actually improve it. Because unlike the rest of the shower wall, their surface is entirely impermeable to moisture.
Check out my Shower Niche Install Mistakes post to get more details on the topics in this section.
See my Complete Shower Niche Guide if you’d like to know more about shower niches.
Shower Tiling Obstacles

My experiences as a bathroom remodeling contractor has exposed me to A LOT of tiling projects, tiling sub contractors and tiling miseries.
Over the years I’ve learned what not to do when building a shower, how to do it the right way, and why. Here are a few of my secrets.
Shower Base and Walls – Level & Plumb
I know it sounds obvious but please make sure that your shower base or tub is level, and your walls are plumb. If they are more than 1/2″ out, you’re tile installation is destined to look a bit hokey.
If you don’t correct any wonky base and walls, you will have to compensate by cutting the tiles that terminate at the walls and ceiling progressively smaller or larger as you move up the wall.
This not only compromises the look but it also causes a significant amount of extra tile cutting because every new row has a different length.
If you are a stickler, you may even decide to cut each end tile with slight angle cuts if you want to match the corners. A TON of work!
I know that it’s a huge hassle to correct the walls and base but I urge you to seriously consider doing all you can to make everything level and plumb if at all possible. It’s worth it!
Ceramic Tile Issues
Tile choice is a pretty big thing that should be considered early in your DIY shower remodel journey.
Although ceramic tiles are used frequently in showers, I would recommend against using them at all in any shower. Here’s why…..
Ceramic is extremely porous and not really a good material to use when your primary goal is to keep the water in the shower and out of your building materials.
A glazed tile only looks like it’s waterproof. The truth is they will still absorb moisture quite readily so try not to use them if at all possible.
The Best Shower Tile – Porcelain
My premium choice for shower wall tile and shower floor tile is porcelain. Different manufacturers all produce porcelain tile products with slightly different water permeabilities, but generally speaking they are waterproof when compared to ceramic tile.
The low moisture absorption of porcelain also means that your mortar will stick much better to these tiles as well, compared to ceramic. This means a positive solid bond, which is good.
If you are interested in more info on this topic, I wrote a entire post on the best tile to use in your shower with all the pros and cons of ceramic and porcelain tile.
Tile Lippage
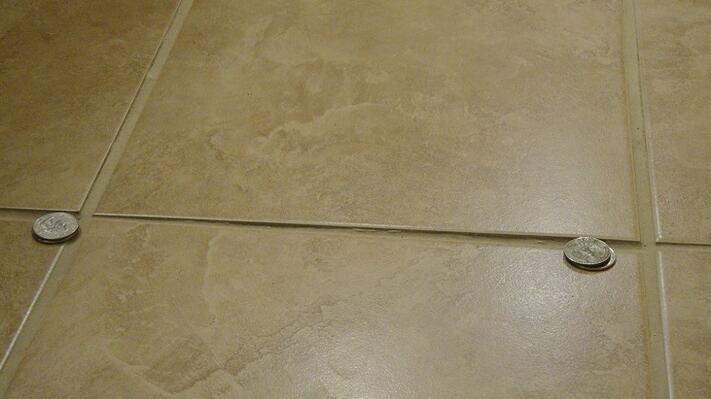
Credit: Ceramic Tile Education Foundation
Lippage happens when adjacent tiles rest on different planes causing the corners or edges not to match.
It’s difficult to describe but easy to recognize. See pic above.
Lippage is a fairly common occurrence, sometimes because of irregular or bumpy substrates but mostly because of inadequate tile setting skills or simply poor workmanship.
It’s a terrible look, so try to plan ahead and use a tile levelling system.
Level Those Lips
The tile leveling system I usually use is Lash Clips and Wedges by QEP because they are available at Home Depot (or online) and quite inexpensive. I would not recommend buying the cheaper knockoffs available online because they tend to break when you’re inserting the wedge.
You can even buy a pair of special pliers from QEP to help fix the wedges in place. Without pliers it can be a little hard on the fingers if you’re tiling an entire shower.
Another easy way to reduce lippage is to install smaller tiles.
Bumps or undulations in your substrate tend to cause lippage in larger tiles but a smaller tile will tend to follow the undulations in the substrate. This makes the undulations less obvious, and the edges of each tile are much easier to match as well.
This was not (by any means) an exhaustive list of tiling hints. Please check out my Shower Tile Installation post for more hints, tips and tricks to help you in your DIY shower remodel projects.
Frameless Shower Door Problems
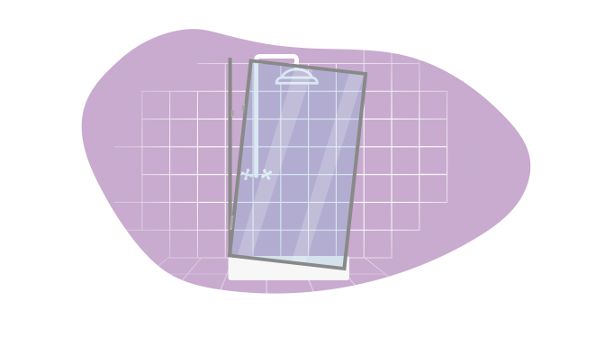
The shower doors that I install the most are the frameless rolling shower doors. These are designed for alcove showers (wall on each side) which are the most popular type. These doors may look a bit intimidating to install, but they are surprisingly straightforward even for a DIY shower remodel.
The rolling shower door usually has a hefty steel rail (or header) at the top, that the door rolls on. This rail is the main structural component of the whole assembly.
Most of these doors are fairly easy to install (if everything is level and plumb), but there are definitely some big problems that you can run into if you don’t plan the install at the framing stage.
Shower Door Support
This type of shower door depends on a very strong attachment to the shower wall on both sides of the shower alcove.
The weight of the shower door and the constant movement of this door places an immense amount of stress on this top rail and there will likely be problems if you support it only by attachment to the tile and backer board.
Problems include fracturing of the tile around the mounting holes, grout line cracking, and complete detachment of the rail from the wall.
These doors are designed mostly for aesthetics, not structure, so they have only a tiny mounting plate where the top door rail (shower door header) attaches to the wall.
Because of this, it’s your job to make sure that this small mounting plate gets the most support possible.
The only way to accomplish this is to install at least 3/4″ thick support framing between the studs where the shower door rail will be attached (see pics). This ensures that you can screw the rail mounting screws into solid wood backing behind the tile and backer board.
Annoying Shower Door Seals
If you’ve ever had a glass shower door in your walk in shower or your tub shower, you’ve had to deal with the ugly glass shower door seals that ruin your “frameless” shower door look. They also have the problem of getting moldy and disgusting because they’re impossible to clean.
Am I right?
Well if you are planning your shower door purchase and are willing to skirt the rules a bit, I have a solution for you. You may have to follow along for a bit before the solution is obvious, but please bear with me.
I call this my Shower Door Reversal Hack or SDRH.
If you’ve ever installed one of these rolling glass shower doors, you’ve probably also noticed that the door is always on the inside of the shower.
The problem with this arrangement is that whether you have a left or right hand opening, the door gap will always be exposed on the shower head side.
This is why the instructions always required you to attach ugly door sealing strips along both the inside door edge and the inside edge of the fixed panel. These door seals keep the water from shooting out between this gap as soon as you turn on the shower head.
I don’t know why they are designed this way but I do know that it’s not necessary, and there are some distinct advantages if the rolling door is mounted on the outside of the shower enclosure instead.
You’re probably thinking…. How do I do this in my shower renovation?
By using the SDRH of course!
Shower Door Reversal Hack (SDRH)
First, you order your rolling shower door or rolling bathtub door with the opening on the wrong side. Yes, you heard right……. the wrong side.
For example, if you want to enter your shower on the left side, you buy a rolling shower door that has a right side opening instead. This way you can mount the door the wrong way around (180 degrees) and still have your opening on the left.
When you mount the door in this way, the fixed panel will now be on the inside of the shower, closest to the shower head. And the rolling door will be on the outside of the shower, on the opposite side of the shower stall.
This switcheroo will also cause the rail and door rollers to be facing outside of the shower, so you also have to be ok with this look.
That means that when water sprays in the direction of the door, there is no longer a gap for the water to shoot through. This also means that there is no longer a need for an ugly door seal on the edge of the fixed panel or the door. Problem solved!
Take my word for it, if you are interested in buying a rolling shower door for your alcove shower (the door glides along an overhead rail), than this reversal is possible. Try it!
Shower Fixture Plumbing Issues

At some point during your DIY shower remodel project, you’ll have to figure out what fixtures you want to install. This decision should also include some shower plumbing considerations.
You may regret it if you don’t consider some of these key issues before you start building a shower.
Shower Head Height
Shower head placement might seem trivial to you but if you don’t mention to your contractor how high you want your shower head, it could very likely end up too low.
Take my word for it……… I recently hired a new plumber to run the water lines in a shower remodel project I was working on. I came back from lunch only to find that he had mounted the shower 90 (the piece that shower head arm attaches to) at only 70″ from the tub base.
I’m not considered a tall man by any means (68″), but I would very likely hit my head on the shower head in this shower (mounted on a standard shower arm).
I will routinely ask my plumber to mount the shower arm at 78″ or even 80″ if the ceiling height in the bathroom will allow it. I have never received any complaints from clients that their shower head is too high.
Besides…… a 80″ high shower head is always a safer bet even if you aren’t 6′ tall yourself, just in case you eventually decide to sell your home to a tall person.
Hand Shower Placement
Another handy DIY shower remodel hint to consider involves the placement of your hand shower (shower slide bar).
I regularly install hand showers for clients in combination with a standard shower head, so they can have the flexibility of using both while showering.
Sounds quite reasonable, right? ……. I agree, but it’s not really necessary .
Instead, I regularly suggest that the hand shower be appropriately placed so that it can serve both functions. If you place the shower slide bar about 2 1/2″ off center (vertically), the hand shower head ends up in the same center position as a standard shower head installation.
You should also make sure that the slide bar is mounted at a height that would allow the hand shower head to be positioned at a comfortable shower head height when it’s attached at the highest point on the bar (around 76″-78″).
Voila!… This installation gives you the best of both worlds. You can still slide the hand shower attachment down low enough for children to shower, and you also have the luxury to detach the hand shower to wash your dog, rinse the shower, ……… or whatever.
It’s a simple concept that is often overlooked, and my clients seem to appreciate it after its done because the shower looks much less cluttered. I also save them a bit of money for the extra plumbing labor and fixture costs, which they never complain about.
Beware the Steam Shower

I realize that most DIY shower remodels will not be steam shower conversions, but for those that are considering installing a steam shower, you REALLY should heed the following advice.
When your building a shower, I would suggest that you think long and hard about installing a steam shower because it exposes your shower, (and often your whole bathroom) to prolonged high concentrations of water vapor, which can damage the structure around your bathroom.
Steam Shower Waterproofing
This topic could easily have been included in the waterproofing membrane mistakes section above but this info is particularly focused on steam showers. So just consider it Bonus waterproofing Hint.
I’m sure you realize the importance of a waterproofing membrane in a regular shower. What you might not realize is that the super high humidity and water vapor pressure in a steam shower demands that you use a waterproofing membrane that is designed for steam showers and steam rooms.
The current standard for steam showers is a waterproofing membrane with a water vapor permeance rating (or perm rating) of 0.5 or less. But this is a general rating that does not allow much of a safety margin.
Instead, I would strongly recommend that you apply a waterproofing membrane with a perm rating of 0.2 or less, especially if one of the shower walls is an outside wall (EXTREMELY important on this wall).
The product I would recommend is Durock Waterproofing Membrane by USG, which has a rating of 0.079 perms. This is considered the lowest perm rating in the business, and this is my go-to membrane for steam showers.
There are also a couple more that are quite good, NobleSeal TS by Noble Company, which has a rating of 0.15 perms, or Kerdi DS by Schluter Systems (NOT the regular Kerdi, only KERDI DS) which has a rating of 0.19 perms.
I have seen a steam shower fail in less than 1 year when a liquid waterproofing membrane was applied (generally much lower perm ratings), so don’t take any chances.
Condensation in outside walls
Even a tiny amount of water vapor will tend to condense on any waterproofing surface that is behind your waterproofing membrane in an outside wall.
Consequently, I would remove any existing vapor retarder in the outside walls of your steam shower. The waterproofing membrane I recommended is all you need.
I would instead ensure that the outside wall is FULLY insulated with spray foam and at least 5 1/2″ deep. You will have to fur-out the wall if the studs are 2×4, but it is very important to maximize insulation depth in this wall.
I use this strategy in all of my steam shower builds.
You can read more about this topic in my Shower Waterproofing post.
Porcelain Shower Tile
I also recommend that you install only porcelain tiles on your shower floor and your shower walls because they are far more resistant to moisture than ceramic.
A sealed grout is also very important. I use Mapei Flexcolor CQ in most of my installations.
I would also recommend that you tile your entire bathroom (including walls and ceiling if possible) and apply a waterproofing membrane to the entire room.
The consequences can be dire if you take shortcuts with your steam shower waterproofing.
If you want more detailed info on steam shower waterproofing, check out my shower waterproofing post.
Wrap Up
Yes, I know that was a long post, but it could have been a lot longer actually.
Hopefully you got some helpful advice so you can steer clear of some of the big remodel mistakes DIYers often make when building a shower.
Please let me know in the comments section below if you have any specific comments or questions for me, or if you want me to clarify anything. I am always happy to help anyone that’s struggling.
This post is for information purposes only and should NOT be interpreted as professional advice. You should always consult a licensed local contractor before undertaking any remodelling work in your home. Click here for my full Personal / Professional Disclosure.


Hi Mike,
Congrats for taking on your first bathroom remodel project!
Schluter systems has a great video showing how to install a mortar pan using the Kerdi drain.
I would recommend going with the prefab foam curb option (rather than building your own) to make a bit easier. I like the Wedi curb better, but they are both good.
Good luck, and have fun with your project!
Steve
Steve: thanks for an awesome thread. I am in the middle of my first bathroom remodel. I’m sure I will run into many issues because this bathroom has been tiled over THREE times. yes, 3 layers of old tile down and I’m still not sure I’ve reached the base. I am on a concrete slab, how or what would you recommend using on the base to properly create a bed for the shower? what kind of mortar etc.
Hi Susan,
This isn’t that uncommon. If it’s just 3/16″, a super easy solution would be to simply fill the gaps with clear silicon. But if any of the gaps are bigger than 3/16″, it might look sloppy if the worker that applies the silicon isn’t really good at it.
A better solution would be to hold a straight edge on the wall where the glass (or frame) is to be installed, and mark out the high points of the tile. An experienced installer/ contractor should be able to use a grinder with a tile cutting wheel to take down these high points so the glass (or frame) fits more flush with the tile face. It probably wouldn’t need much grinding since all the remaining small gaps could be filled with silicon.
You should also keep in mind that if you choose frameless, the glass needs to be cut to match the angle between the floor and wall exactly. These panels are always cut at 90 degrees (unless it’s custom), so if the floor/wall angle is not exactly 90, you’re going to have a much bigger gap problem to deal with.
The tile face trimming job shouldn’t be difficult for a skilled worker, but you should keep in mind that there isn’t really any margin for error in a job like this.
Good luck with you shower project!
Steve
Steve, I am in the beginning stages of shower redo. I chose a wall tile that has a textured/uneven face. It is 6” x 24”. The tile depth varies as much as 3/16” throughout the appearance is that of a cut stone. I am starting to have extreme concerns regarding the installation of a shower door, unframed or framed. I like this tile , but I wonder if I just shouldn’t find a smooth tile face. I did contact a shower door installer Ande sent pics and he said it would be fine, but I don’t have the capital to mess around. Thoughts?
Hi Raquel,
That’s not fun at all, especially after a new remodel. I guess you should be happy that the new shower itself was not the cause of the leak. That could have been disastrous.
If the p-trap was leaking, it was obviously not installed properly. If it was installed correctly, you may never have noticed any problems your old 1 1/2″ drain as long as it was kept clean of debris. However, the 2″ shower drain code standard has been around for a long time now, so he/she should have been aware that it was required.
This drain conversion can be a lot of work because the entire length of the horizontal drain line (from the shower to the drainage stack) must be replaced. That is why many installers take the easy route and use the existing drain line.
I’m happy that the leak was discovered and fixed. Enjoy your new shower!
Steve
Hi,
Hired tiler to convert tub to shower. He used kerdi system. Two weeks after using shower, there was a leak in kitchen ceiling. I am original owner 16 years with tub no leaks. Called plumber and found it was drain pipe, p-trap. He had to convert the pipe to 2″. Should tiler have known to check for this?
Hi Betty,
Thank you for your comment and compliment!
I’m sorry that I can’t come over and help you myself, but I don’t live anywhere near Las Vegas! As such, I also do not have any recommendations for tiling contractors in your area, unfortunately.
The best thing to do is to get a recommendation from any friend or relative that’s had some tile work done recently. If this doesn’t work, look at online reviews for tiling contractors in your area; either Google reviews or their website reviews (or other sources). Then get a few quotes from these prospects. Treat it like an interview and ask a lot of questions… like which waterproofing membrane do you use and why? You will have to do a bit of research first to be able to come up with your list of questions, but this interview will be as much about getting a feel for the company and the person, as it will be about the answers they give you. Hire them only if you feel comfortable with the person and the pitch.
I would also recommend that you not hire the company with the lowest quote. Price is not always a reliable indicator of quality and professionalism but without much else to go on, a higher price shows that they are confident about their ability to outshine the competition with something other than pricing.
Good luck with your project!
Steve
Wow so much good information. Now what I need is to find someone to do my tile and membrane bottom. I’m so scared because I don’t know how to find someone professional like you you never know who you’re going to get. Do you be able to tell me of a good tile person in Las Vegas Nevada my area code is 89117 appreciate it so much I’m a nervous wreck
Thank you
Thanks Steve.
Hi Prasad,
Thank you for your comment!
If you are referring to the tiled wall assembly, weep holes are not generally required in a modern tiled shower (or tub shower) if it’s built according to industry “best practices”.
In the “good old days” it was always assumed that water would condense behind your tiles (on an outside wall) because most homes had little or no insulation, 2×4 stud walls (or less), vapor retarder plastic sheet behind the wall board, no waterproofing membrane, and no grout sealer or pre-sealed grout. Condensation was inevitable so weep holes were a good idea at the time.
These days, modern shower construction “best practices” requires a deeper (2×6) fully insulated stud wall, an under-tile waterproofing membrane, and sealed grout. With this assembly, no significant moisture makes it behind your tiles and it doesn’t condense there because the “dew point” is now further back in the stud wall where there’s no moisture. That means no more weep holes required!
In fact… by creating an escape route for liquid water, weep holes also create an entry point for liquid water to wick up behind the tile via capillary flow. A nasty side effect of this “old-school” practice.
So if you’ve built your shower walls correctly, you should simply caulk the entire wall-shower pan margin. There will always be a tiny bit of moisture settling over time where the vertical grout lines meet the pan (weep holes or not), which means the silicon bead should be replaced every few years regardless.
I hope I’ve made things a bit clearer.
Steve
Steve, I have Installed shower pan, tiled and grouted. Time for me caulk the bottom. Hardie backer was painted with redgard. My shower if C shaped with 3 walls and single threshold has false door. Should I be leaving weep holes and if yes where?
Hi Scott,
Thank you for your kind words about my post. I’m happy that you found it useful.
I’m sorry to hear about your unfortunate shower rebuild experience. I will try to help if I can.
It’s always difficult to create this joint and make it waterproof after the tiles have been installed, but I believe it may be possible in your case, if you want to go through a bit of trouble.
The benefit of using the Wedi wall panel in this instance is that the Wedi System relies on a pan / wall seal created with Wedi joint sealant rather than an overlapping strip of sheet waterproofing material over pan and wall (as with the Schluter Systems). The Wedi System requires that you push the wall panel down into a 1/2″ x 1/2″ notch at the perimeter of their shower pans filled with Wedi joint sealant to create a watertight seal.
Although the Schluter pan does not have this notch, you could conceivably create this notch with a utility knife. You would have to approach this carefully, but as long as you have access to a 1/2″ strip of the pan around the perimeter, I believe it should be possible to cut out a 1/2″ notch. You can then recess the Wedi wall panel into a bed of Wedi joint sealant applied into this notch. You can use the install instructions for any of the Wedi shower pans to guide you through this process.
I know… it sounds like a lot of fiddly work, but I think it could be done with a careful approach.
I hope it works out for you. Good Luck!
Steve
Hi Steve,
Thank you for the great article and for all the additional answers you’ve given. I’m hoping you can offer us some advice.
We had to fire our builder and are in the process of fixing his mistakes. . Our current installation is a step in shower with a Schluter pan with 1’x2′ tile, and GoBoard backer, also with 1’x2′ tiles.
The tile on the pan is correct, but the tile on the walls has to go. As we started demo, we noticed that the waterproof membrane on the walls does not wrap under the tiles on the pan. As you have recommended, we will be upgrading the backer to Wedi. Is there any way to obtain proper waterproofing of the wall/pan joint with out ripping up the tile on the pan? Thank you in advance.
Hi Ginger,
Thank you for your comment!
If there is no shower pan or if there’s plywood under the tile on the walls or base, this is unacceptable. It will be a waste of money for you to pay someone to re-tile the shower floor without installing the appropriate substrate and waterproofing layer beneath the tile. Unfortunately this means that the wall tile should also be removed (and wall sheeting) so you can start from scratch.
It is important to install a new shower pan and tile backer board that does not absorb moisture (plywood backing is NOT OK). If you’re installing a tile ready pan, you also need a waterproofing membrane installed on the pan & backer board. You will not need to install this membrane if you install a foam base and foam wall panels like Wedi, Hydro-Blok, Schluter etc. but a waterproofing layer under your tile is extremely important.
Sorry for the bad news, but it will cost you a lot more in the long run if you don’t repair it properly now.
Good luck!
Steve.
I am having some remodeling work done and was having my shower floor retailed as part of that. My shower has cultured marble walls and the tiles floor had become discolored so I was only going to replace that. The shower is on the first floor with a concrete slab. When my contractor removed the old tile, they discovered there was no shower pan and now they are proposing retailing without one. I am worried about the wood behind the marble being compromised by moisture. Can you tell me how you would proceed?
Hi Ken,
Wedi sells a 48″x 60″ foam base that would fit that space. The great thing about the foam shower bases is that you can cut them to size as long as you are able to line up the drain. They sell pans with RH, LH and center drain configurations.
If you want a hand shower (and are not interested in replacing the shower valve assembly) you should replace the shower head with a hand shower. These units can hang from a collar on the shower head arm. This allows you to take a shower normally, or just remove it from its collar to use the hand shower. Teeing off either of those water lines will not achieve what you want because your valve can only divert into two directions, not three.
Good luck with your project!
Steve.
My shower space measures 46 x 56. Are there any foam floor options or do I need to build a slope with mortar on top of tarpaper covered wood subfloor? Should I install chicken wire to reinforce the mortar? I have a standard shower outlet at 80 inches high.Also I want to install a separate shower outlet for the hand held hose device about 10 inches to the right. Should I tee off of the line going to the shower or hook into the tub filler outlet on the bottom of the shower valve ?
Hi Ray,
Thank you for your comment!
I would suggest a 36X60 Fundo Primo tilable foam shower base by Wedi! I’ve installed these many times and they’re great. These bases work well for non-standard shower area like yours because they can be cut to the right size to fit the space. They have versions with RH, LH and Center drain arrangements so it should work well as long as your drain position isn’t too far off the center line.
Look up some Wedi install videos on YouTube. I think you’ll find that installation is pretty straightforward for a DIY’er like yourself.
Good Luck!
Steve
I need a new shower, Problem is it measures 53×34, I’m a do it yourselfer.No room to expand
Any suggestions?
Hi John,
Thanks for your comment and for your helpful advice! I’m sure my readers will appreciate it!
Steve
Hi Steve,
I am just finishing up a large (6×8) steam shower. Something that I think that people considering a steam shower should be aware of iis the fact that the ceiling should be sloped 2″ per foot to avoid globs of hot warer “raining” from the ceiling. The slope sends that condesation to one wall rather than dropping all over the showeree. On this one I used Wedi vapor 85 panels designed specifically for steam shower use. Pricey but well worth the cost. When using sheet membranes such as kerdi or subliner dry it’s best to use an elastomeric caulk rather than thin set for seams and banding rather than thin set mortar. Vapor can penetrate the mortar at the seams. Both of these manufacturers supply these products.
Hi Scott,
Thank you for your comment!
Sorry for the late response. This one slipped past me somehow. 🙁
It seems strange that your rough opening would be 59 1/4″ if there was an existing tub or shower in this space. Hmmm… If your rough opening is indeed 1/2″ too small, it might be OK to notch each side 1/4″ to allow the pan to fit, but if the notch needs to be deeper than that, I would recommend against it. You would still have to make sure that the gap between the backer board and the shower base mounting flange was sealed properly. This might be a bit more difficult (but possible) if the pan is recessed 1/4″ below the backer board surface.
Another alternative would be to remove the studs on one wall (if it’s not load bearing), and rip them down 1/2″ to get the extra space you need. You will have to also rip the top plate but maybe not the bottom plate, if the shower base mounting flange clears the bottom plate (is more than 1-1/2″ off the subfloor). I think this might be the more elegant solution because the finished tiling will look better as it meets the base.
If you decide to use this strategy, you should install 1-2 more studs in this wall at 12″ (or less) on center to compensate for the increased flex in this wall caused by the new 3″ ripped studs. I would also install some horizontal bracing between these studs just to be safe.
I hope it works out well!
Steve
Steve, what a great article. This will definitely help with my install. I didnt even know about priming the backer board. I do have a question though. My rough opening is 59.3″, is there a way to make a 60″ or 59.875″ shower pan fit? Perhaps notch the studs? What would you recommend?
Hi Mike,
Thank you for your comment!
I’ve only installed GoBoard a few times but it seems to behave pretty much the same as the other foam boards even if it’s made from a different kind of foam.
I generally steer clear of all foam boards except the Wedi and Hydo-Blok boards because of their cement coating. Check out my Shower Tile Backer Board post to find out why.
Good luck with your project!
Steve
Steve thank you for the great article on tiling a shower.
You dont have anything on using Goboard for a tile backer. Do you have any experience with this product?
Hi Glenn,
Thank you for your comment!
I’ve also seen Kerdi shower system leaks, but in my experience they have always been be due to installation error, not product failure.
I really don’t like the idea of layering waterproofing products from different manufacturers for the reasons I go over in my waterproofing membrane post. But since you decided not to use the Kerdi membrane for the walls and corners, you have already applied the AquaDefense to the shower pan in the corners… I hope!. So I’m guessing that your question is more about if you should continue to apply the liquid membrane up to and around the drain as well as the corners.
If so, I guess it wouldn’t hurt to cover the whole base with AquaDefense. Since you didn’t use Kerdi membrane on the walls & corners, I would suggest that you fiber tape the pan/ wall margins and pan/ curb margins and used extra coats of AquaDefense to protect these corners. These will be the weakest link in your waterproofing layer.
Good luck!
Steve
I just installed a Kerdi shower base in my small 4×3 feet shower stall. I followed all the Kerdi instructions to the letter. However, I am still not comfortable with tiling directly over the base, having heard of cases where the Kerdi membrane has leaked. The shower walls were constructed using Denshield and coated with Mapei Aquadefense liquid membrane. Would it hurt to also coat the Kerdi base with aqua defense as well? Thanks.
Hello again Prasad,
I don’t normally answer such a large number of complex questions in the post comments, but I will give it a shot just this one time 🙂
By your description I can only conclude that you have not installed this base correctly. The mortar is intended to provide additional support for the base, it is not supposed to be sloped. I can’t imagine that the install instructions would have called for this. And if there is some flex at the corners after the mortar has set, it seems to me that you did not “wiggle” the base enough when you set it into the mortar. The difficult thing about a mortar bed is that you need to be certain that it has spread evenly and completely beneath the base which is always very difficult to determine.
Regardless, you should not be distorting the base in any way while installing it, and there shouldn’t be any flexibility at the edges. It’s difficult for me to know exactly what’s going on there but I think it’s probably too late to attempt any adjustments at this stage. It sound to me like you should probably remove it and start again.
Personally I try to level the subfloor perfectly before installing any fiberglass / acrylic base so I don’t have to put down a mortar bed. Most shower bases these days are constructed with a wood support structure beneath to eliminate the need for a mortar bed if installed on a level subfloor. I would not install any acrylic base that requires a mortar bed in its installation.
As for your Hardibacker question, I don’t know why there would be any gap between the stud and backer board. The Hardibacker attaches flush to the studs and is mounted just above the “mounting flange” of your shower base (which is also mounted right against the studs). Below the backer board (above the shower base mounting flange) there should be a small gap that you should seal with polyurethane sealant (or silicon in a pinch).
The stainless steel shower niche that you’re referring to is indeed made by Redblock Industries. Unfortunately it will not be in stock for another few months and we have no samples left either. Sorry about that.
Good luck with your project!
Steve
Steve, Thank you quick response. I’ll follow that. Few more of questions:
I installed a dreamline 32″x60″shower pan (acrylic, reinforced with fiberglass – https://thd.co/2LUC3w9 ) with a mortar bed in guest bathroom. Though I tried to install mortar bed with a slope recommended by instructions, I think I might have wiggled the shower pan little too much. I say this as the shower pan on the mortar feels very solid for most part but around back corners of 60″ side, there is minor movement in the pan when I step in there. One corner movement is 1/16″ while the other corner seem to be 1/8″. I pushed pan down with my weight and put a screw (not drilling through but above the lip/edge) to hold the pan down as shown here in red annotation https://amzn.to/3u1gkUo Question: 1) do you think this will hold it down? manufacturer says putting a screw through the edge will void warranty and it could also lead to water leak I think. 3) I have a bit of access to around the corner (my palm goes where blue arrow is shown). should I stuff spray foam or watery thinset? 4) last option is redoing everything now which I am trying to avoid obviously but probably better than tearing down entire wall later as my guess is I just just replace last row of tiles if I have to replace pan in future.
When I put the hardyboard on top of shower pan, it will sit in front of the lip/edge. That seem to create a 1/4″ of gap between stud and hardyboard. Is there a chance that I’ll crack the hardyboard when I screw? This will be a common problem for all showerpan plus backer board installations but can’t seem to find any material online about it.
I was wondering if there anyway to get stainless steel shower niche on your site? Looks like you are out of stock and I can’t wait until you are in stock. I live around Seattle. I can drive up to Bellingham, WA (that’s where you are located I guess). Seems like a great product and I couldn’t find anything like that outside your site.
Hi Prasad,
Thank you for the comment and for the compliment!
I just noticed that I mentioned (in my Shower Remodel Problems post) priming the tile backer board and I provided a link to my Shower Waterproofing Membrane post for more info, but I neglected to provide it in that post. Sorry about that! I will add this to my post immediately but in the mean time, here’s the answer to your question:
Hardibacker is not as porous as regular cement board, but it will still benefit greatly from priming (bonding) before you apply a liquid waterproofing membrane. The bonding agent that I use routinely is Weldbond. You can find it in most home improvement stores. Just mix it with water in the appropriate concentration (follow the directions on the bottle to use it as a bonding agent) and apply it with a roller and brush for complete coverage. You should only need 1 coat.
Good luck with your project!
Steve
Hello, I am amazed with the level of detail you provided in your articles. I have a question about the suggestion of primer in thie article. You say “PRIME THE BACKER BOARD!”. Later you say, do it before waterproof membrane is applied. I am installing 1/2 inch Hardy board for shower wall (base is a shower pan) and was going to apply redgard waterproofing membrane via roller. Looks like there is step you are suggesting about priming. What kind of primer is not described here nor the other blog where you discuss various backer boards. Can you please elaborate?
Hi Megan,
Thank you for your comment!
Virtually all bathtubs now have a mounting flange and a tiling flange (or ridge). The mounting flange attaches the tub to the wall and this is usually overlapped by the wall assembly (whether a prefab or tiled wall installation). That means that it would not be possible to remove the tub without cutting away the bottom part of the shower wall to reveal the mounting flange. So in other words, the wall will need to be replaced as well.
There’s no reason that you couldn’t replace the old prefab shower walls with a new tiled wall assembly. It just means tile backer board, waterproofing and tile will need to be installed after the old tub and walls are removed. A bit more work than installing another prefab assembly, needless to say.
If it’s leaking on the hot side and the valve has been in use for years, it’s likely not that complicated. I would guess that the valve seal is probably compromised. It’s very common in these older fixtures because the hot water causes the seals deteriorate faster. Try to replace the valve cartridge (or washer, depending on how old). You should be able to find out how to do it online easy enough. It may not fix the problem but it’s a great place to start because it’s super cheap and easy to do.
Good luck!
Steve
Thank you for the very informative post! I have a couple questions. My parents have cheap prefab tub/shower walls. We are trying to do a bathroom renovation on a super tight budget. We need to replace the tub because it has a large crack. Can we get away with not replacing the walls at the same time? I haven’t run a tiling project past them for approval yet, but are there any common pitfalls in replacing prefab walls with tile?
Also, we have a leak that I am having a really hard time tracking down. When we turn on the hot water it leaks at the handle but also at the shower handle (it’s a 3 handle set up). Is the leak inside the wall?
Thanks for any insight you are able to give me.
Hi Elizabeth,
Thank you for your comment.
I’m not quite sure why your contractor decided to raise the level of the shower. If the substrate is concrete, there are ways to level it regardless of any cracks. And if a crack is present, it should be have been filled, and an isolation membrane installed. The pan could then be installed over top.
And regardless of the type of shower pan installed (mortar, prefab foam or acrylic) and where the drain is located, the perimeter of the shower base should be the exact same thickness all around. That means that your first row of tile, and every row above it will always be level.
In other words, it sounds like the shower pan was installed incorrectly. I guess at this point you should probably tile all the way up the wall because it will be harder to notice the wonky tile cuts at the ceiling than at 1.5′ below the ceiling. But that’s only my opinion.
Sorry I couldn’t be of any more help. Good luck.
Steve
Hi..
We have a 30 yr old bathroom and decided to take out the tub and put in a walk in shower..
After removing the tub, we noticed a large crack in the foundation and after putting a level on it, our contractor determined he would have to raise the shower pan a significant amount. This was done with concrete. Because of the need to raise the pan and make sure it drained properly..the tile in the shower and the surround around the walls is off..it actually looks a little crooked. If I understand it correctly, one side of the shower was x amount tall, and the other side was x amount lower.. is there anything I can do to visually help how it looks!? We stopped tiling about 1.5 feet below the ceiling..should we tile all the way to the top? Any advice would be appreciated..thank you
Hi Nathan,
Thanks for your comment!
I’m guessing the install was a bit hasty because there’s no reason the door couldn’t have been centered on the curb or biased to the inside rather than the outside.
Regardless….., your options are 1. Move the door an inch or so inward. You’ve probably already considered this but you could move it just slightly, as long as the previous drill holes were still covered by the frame, and secure attachment to the framing beneath was still possible.
Option 2. You could simply install a shower door sweep/seal/jamb on the bottom (and possibly sides) of the door to redirect the water inward. If the door is too close to the curb to allow enough room for this seal, you should be able to raise the door via it’s adjustment screws. This seal would be an example of what you could possibly use on the bottom of the door.
Hopefully one of the two options will solve your problem. Good luck!
Steve.
Our contractor accidentally mounted the door like your SDRH. I like the look of it, but the main problem is water will drip down the door and out of the base, onto the tile floor. Normally there would be a dam outside the door to force the water back in, but there is next to no room on the base given the door is now on the outer edge.
Do you have any recommendations on how to handle this problem? Thanks!
Hi Ian,
Thank you for your comment.
I can tell your looking for a quick and easy solution but I would say that your only option is to remove the tile. At least you would feel secure that the problem was assessed and corrected properly. It should be relatively easy to remove the tile if you haven’t grouted yet. I think it will haunt you if you don’t. Just my opinion.
Good luck!
Steve.
Hello thanks for the useful info! I just finished laying a tub surround in porcelain and I have one tile that flexes on a corner (poor bond/ maybe not enough thin set). Is there any way short of removing the the tile to stiffen the corner so my grout don’t flex out (haven’t grouted yet) maybe a epoxy I could squeeze behind or something? Thanks
Hi Shelli,
Thank you for your comment!
I am assuming that your handyman left the original valve assembly in place. It seems like a pretty huge oversight if you had already purchased a new one for him to install!?!
Regardless, it would be an incredibly difficult job to remove a section of the tile and backer board to get access to the valve assembly. I would strongly discourage you from doing this. I have replaced a valve assembly once or twice (in a finished shower) but only from the other side of the shower wall. This is also a difficult and detail oriented job to undertake but it is possible because it only requires cutting through the drywall on the other side to gain access. This assumes that your valve assembly is not on an outside wall of course.
If the valve replacement isn’t possible then you can try to search for a replacement valve handle for the existing valve/ trim assembly. This might be difficult depending on if there were different styles of handles available for this valve set at the time, and how old the valve is, but it’s worth a try.
Good Luck!
Steve
Wow! Great info! Wish I would have seen this earlier. We had a handyman install our shower and he did the tiling without putting in the faucet handle. Now we have an absolutely stunning shower but the handle is old and looks terrible. Is there a way to chip off some of the tile to get a new handle in there or are we stuck with this?
Thank you!
Hi Julie,
I looked up the fixture you want to install and discovered that this shower head assembly is designed to mount into an existing shower wall. So when you say that you are “renovating” I assume that you are using the term loosely and are not actually replacing the shower pan, shower walls, fixtures etc. If this was the case, you would simply ask your plumber to move the shower water supply connection down a few inches. If you are leaving the shower wall as is, I believe the only option is to choose another shower head assembly that does not extend so far upwards from the water supply connection. I installed a very similar assembly a couple years ago made by Kohler but I can’t seem to find the model number. From what I recall, this model may not have extended as far up from the water supply connection. You could check with Kohler and other manufacturers to see if the they make a model that is a bit shorter than the one you chose.
Sorry I could not be of more help.
Good luck!
Steve
Hello, we are renovating the bathroom and finding that the showerhead is way too high. We don’t know how we are going to fix this. We can’t cut holes in the roof! Thank you for your informative posts. This is the shower we are trying to install. https://shopycart.com.au/home-garden/bathroom-accessories/wels-8-rain-shower-head-set-square-dual-heads-faucet-high-pressure-hand-held/
Hi Albert,
Durock and Permabase are both excellent cementitious tile backer boards. Every backer board has it’s plusses and minuses, but you really can’t go wrong with either of these two products. You should check out my backer board post if you’d like more info on the topic.
The only thing I would suggest is that you consider installing a sheet membrane with a higher perm rating instead of Redgard, especially if one of your shower walls is an outside wall. I explain my reasoning for this in my waterproofing membrane post if you’re interested.
Good Luck!
Steve
What product do you recommend for shower underlayment if using Redgard as a waterproofing membrane? I am considering dura rock or permanent base.
Hi Christin,
Thanks for your comment and your kind words.
It sounds fixable but I’m not sure if I’m understanding your situation correctly.
Maybe you should shoot me a couple of pics of your shower (the valve wall area in particular), so I can make a better assessment of what the problem is. I will try to make some suggestions that are not too complicated or difficult for you guys to tackle on your own. Please send them to [email protected].
Steve
Hi Steve-
Your articles are great. I used to lay tile, carpeting, etc. Before I couldn’t anymore. My Master bathroom tub/shower have been out of commission for a year now. I love my husband, but mechanically inclined he’s not.
We bought prefab shower walls and the wall that goes where the faucet, shower, water valves are… we can’t get it in place. The faucet and water valves protrude out further than the wall and it just won’t slide/click into place. I don’t know what to do. Also my husband has had to make two hikes and the faucet hole still isn’t right. Now our other bathroom walls are disintegrating. The person who “flipped” the house we bought put regular drywall behind the tile that he glued on. Any help would be greatly appreciated. P.S. this is something we’re going to have to do, due to finances.
Hi Raul,
I couldn’t agree more! The details of proper shower wall construction are super important if you want your tiling job to go smoothly.
Congrats on a successful project, and thanks for your comment!
Steve
Hi Steve,
I researched a LOT before starting my master bath remodel and still fell short on some things as I learned as I went along. I do wish I read your article first and do think the importance of prep for level and square framing and walls should be emphasized over and over again. My biggest regret is that I didn’t spend more time (and I have spent a LOT of time on this reno from studs to tile) making sure everything was straight, level, and plumb. Please make sure all your studs are level and flat. DO NOT SETTLE for “close enough”, even as you’re tempted to put the cement board up just to show your wife you’re making progress (I laugh now about the corner cuts). I paid for this over and over as I laid tile (sometimes 4-5 times on the same 12 x 24 tile) and tried to get a flat set. I also learned that tiling is hard work but I kind of enjoyed it. I can’t say the same for caulking the shower corners where it’s impossible to get a clean edge like grout. And I hate drywall, joint compound and sanding even more. But I’m sure these are also a matter of practice. Anyway, I just wanted to thank you for the nice article and stress to all the DIYers that time spent on prepping for flat and level walls will pay off in spades in later stages.
My project is almost done and it’s going to look just like I pictured it. Cheers!
Hi Dave,
Thank you for your comment.
If I’m understanding you correctly, you’ve installed some framing behind the niche mounting flange which is great, but you’ve attached the niche to the surface of the backer board which has caused this problem.
Because the mounting flanges on all the preformed/ prefab tiling niches are 3/8″ to 1/2″ thick, you must cut the backer board hole a little larger to allow the mounting flange to be attached to the surface of the framing, not the backer board. This way the flange would be flush or slightly recessed below the backer board surface, and you would not have this problem.
I assume the reason you mounted the niche in this way is to avoid the inevitable gap between the niche mounting flange and the backer board (potential leak point). This is definitely a disadvantage of this type of niche however, the potential leak problem is solved when you fill this margin with mortar and apply the waterproofing membrane. The membrane will straddle this margin and attach firmly to the niche mounting flange.
In other words, I would not recommend the two “fixes” you’ve suggested. They might be a bit easier to do, but the 3/8″ “hump” you will be creating around the niche will only cause you tile registration and lippage problems come tiling day.
Let me know if you have anymore questions, and Good Luck!
Steve
Hey Steve, Great post and very informative and easy to follow! My question: I’ve finished the entire shower with hardibacker, taped and mortared the seams, cut in the Niche (pre-made plastic) and installed it over the HB board into the slot we cut out. Screwed it into a full stud frame top, bottom and sides and mortared around the transition to the wall…
The problem is that the prefab Niche flange is protruding out (3/8″ maybe) more that I like and I fear will alter the plumb of the wall with the 3″ X 6″ subway tile and show the raised area too much. Should I mortar out around the frame farther into the wall space to make up for the protrusion, let it dry and then tile over OR should I put on the thin-set heavier in that area when setting the tile and compensate for the deficit buildup that way?
Hi Nancy,
Thank you for your comment.
Yes, you should definitely insist that your contractor install a shower wall waterproofing membrane beneath the tile especially if one of the shower walls is an outside wall. It is considered “best practice” in the industry and I would never construct a tiled shower surround without this layer of protection. The fact that you are installing ceramic instead of porcelain tile on the shower wall only further supports the installation of a waterproofing membrane (see my waterproofing membrane).
The link above also provides a bunch of useful info on the different types of waterproofing membranes and my recommendations. I can tell you that Schluter Kerdi is an extremely popular sheet waterproofing membrane, and RedGard is a very popular liquid waterproofing membrane. If your contractor is unaware of these products and/ or how to install them, I would recommend that you call a waterproofing specialist in your area. Just Google “shower waterproofing contractors” to find somebody that’s qualified.
Let me stress it one more time….. Don’t neglect the waterproofing membrane, especially if you are installing ceramic tile and/or your shower is on an outside wall!
Good luck with your shower remodel, and let me know if you have anymore questions.
Steve
Steve: When renovating a bathroom, how would I know if there is an existing waterproof membrane in place? We have a contractor performing the work in which all the previous tile on the shower/tub walls and on the floor are being removed and replaced with porcelain tile on the floor and ceramic tile on the shower/tub wall. It is a small guest bathroom with a shower/tub combo and the tub will not be removed. I looked at the materials budget list and I don’t see a waterproof membrane listed? Our town-house was built in 2005. Should I insist that a shower waterproofing barrier be in place on the shower walls? If so, what should I consider as acceptable in this regard? Thanks so much ahead of time. I look forward to your reply.
Hi Drew,
Thank you for your comment.
Thank you also for the compliment…. I really appreciate it.
To answer your question, I have only included a few of the most popular tilable shower base products and/ or ones ones that I have used myself.
Good luck with your steam shower project!
Steve
Steve: your comments and recommendations are by far the most comprehensive and helpful o have read after extensive “homework” in preparation for a steam shower remodel project. I notice that in reviewing custom shower based you do not consider the KBRS products. Any reason for this omission?